


Design Filler
Design Filler
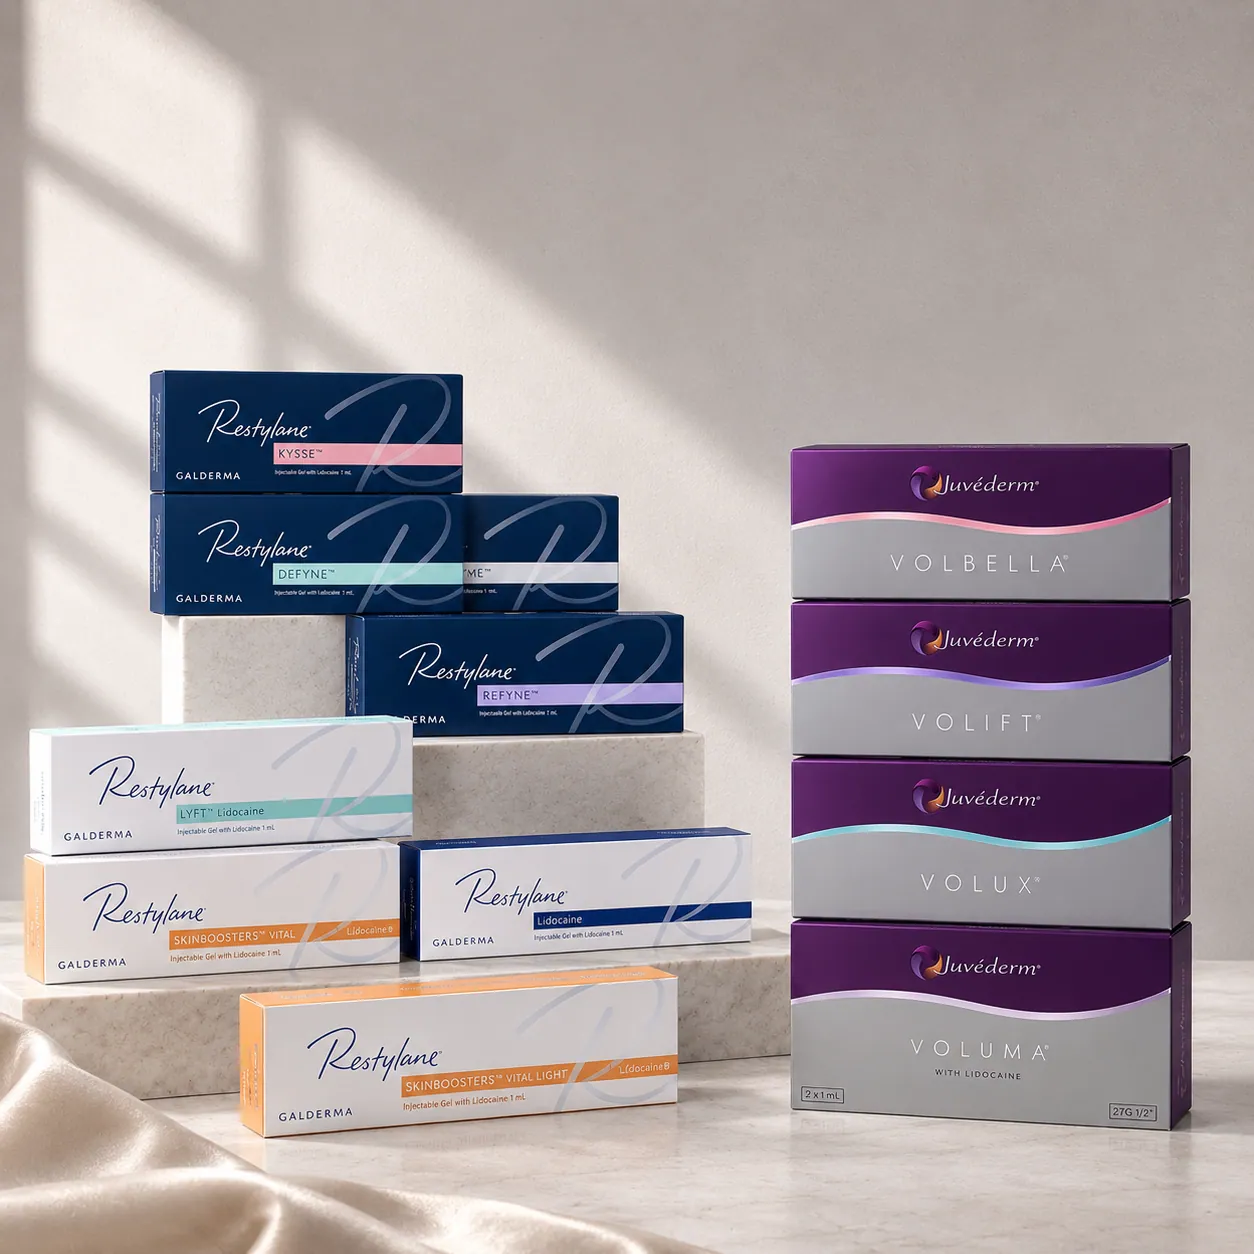
Fill in the sunken areas to refine your face shape
Design Filler
Design Filler
Attempts to fill in areas lacking volume have existed for a very long time. Initially, there was a lot of trial and error in determining which material was suitable, but the fillers used today are made exclusively of safe materials that are highly biocompatible and biodegradable within the body .
Fillers are one of the oldest and safest cosmetic treatment , and they are reasonably priced relative to their effectiveness. By filling in sunken areas, you can create your desired volume lines immediately on the spot .
There are some people who are unconditionally afraid of fillers, to the point where the term 'filler phobia' exists. However, fillers are substances that can be used with peace of mind because they immediately add volume and contain an antidote (Hyaluronidase).
Why Design Filler
Looking young and beautiful
There are three characteristics of face shape.
Design Filler examines the face based on these three criteria, and
Fills in the missing parts.
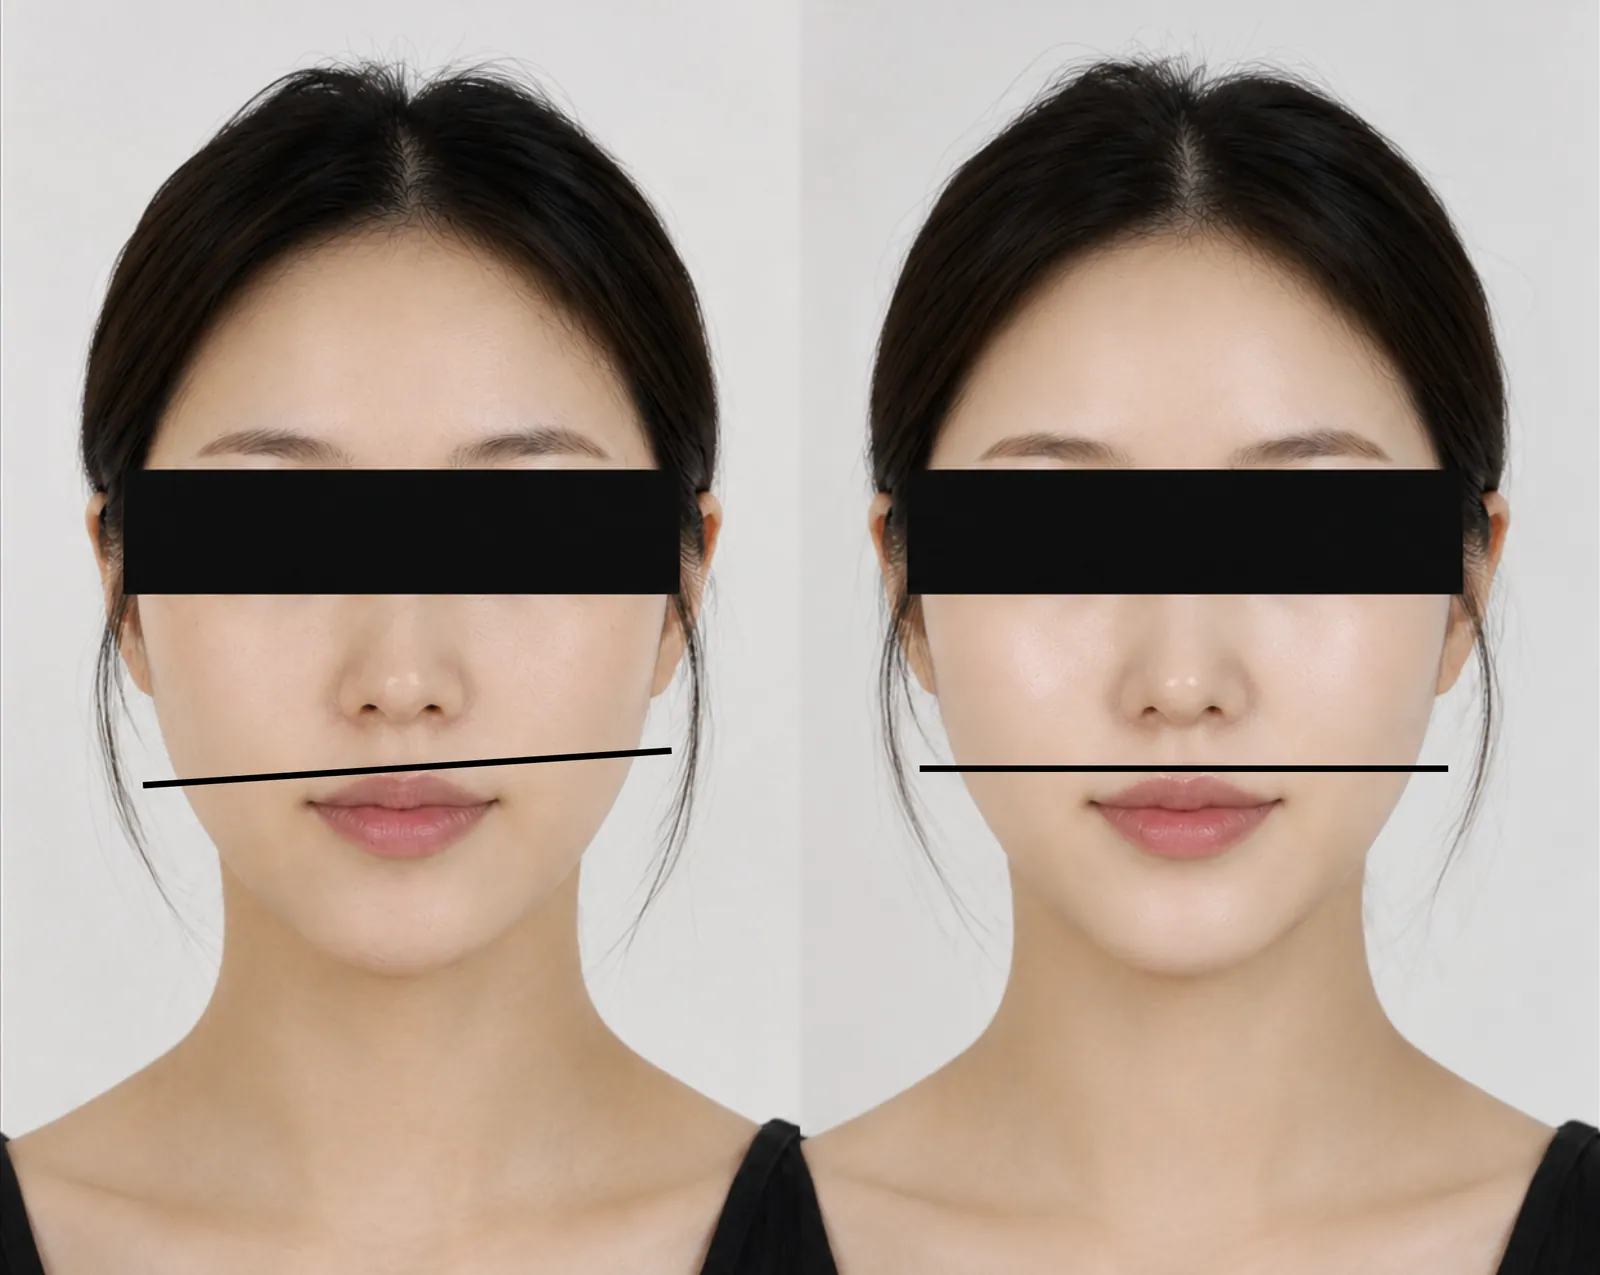
It is well symmetrical
A face with well-balanced left and right sides gives a sense of stability. Most faces have asymmetry of varying degrees, but simply filling in the volume on the sunken side makes the overall impression look more balanced .
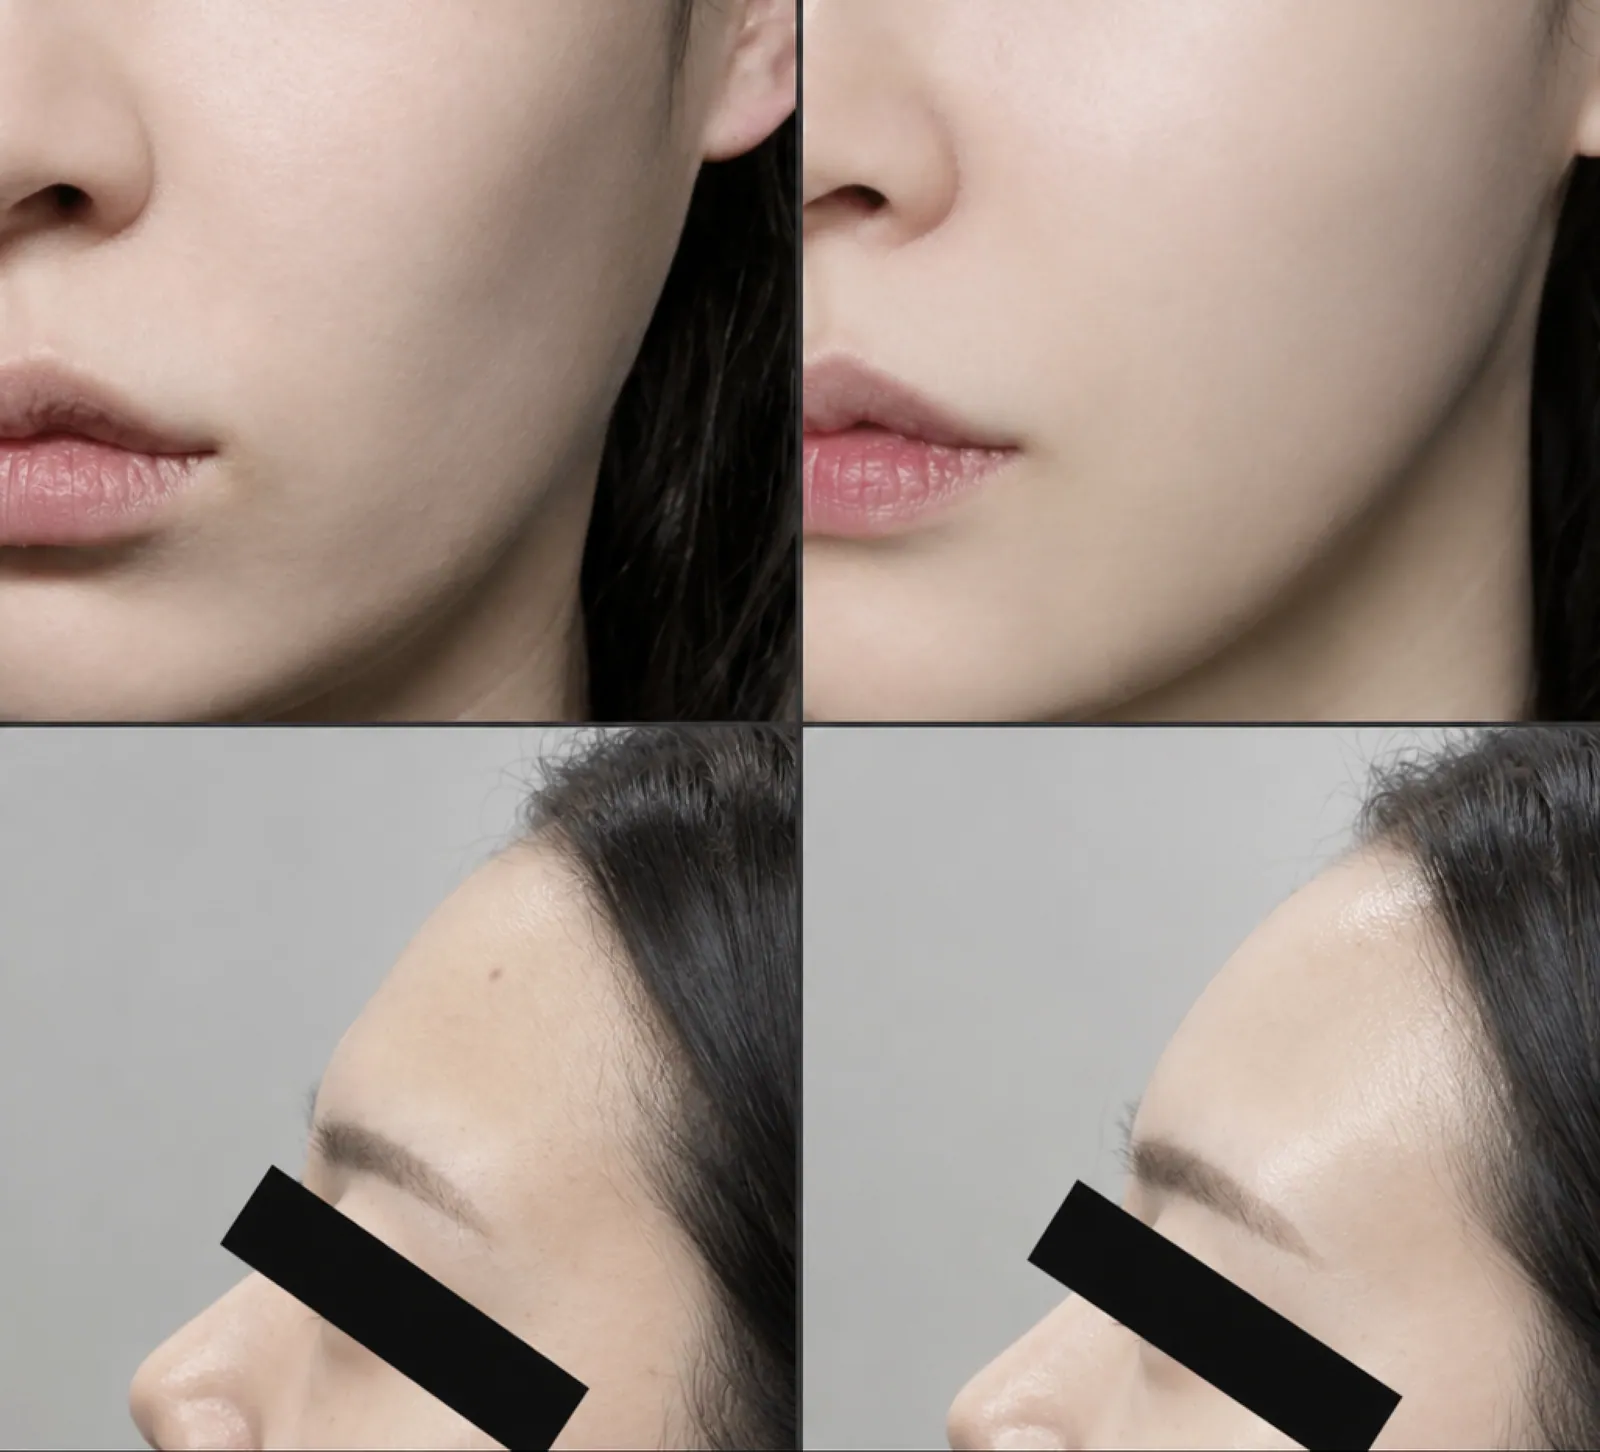
The deviation in curvature is small.
If the facial line follows a gentle C-shape, it looks soft and youthful. If there are areas where it bends into an S-shape, fill in the sunken sections to reduce the difference in curvature.
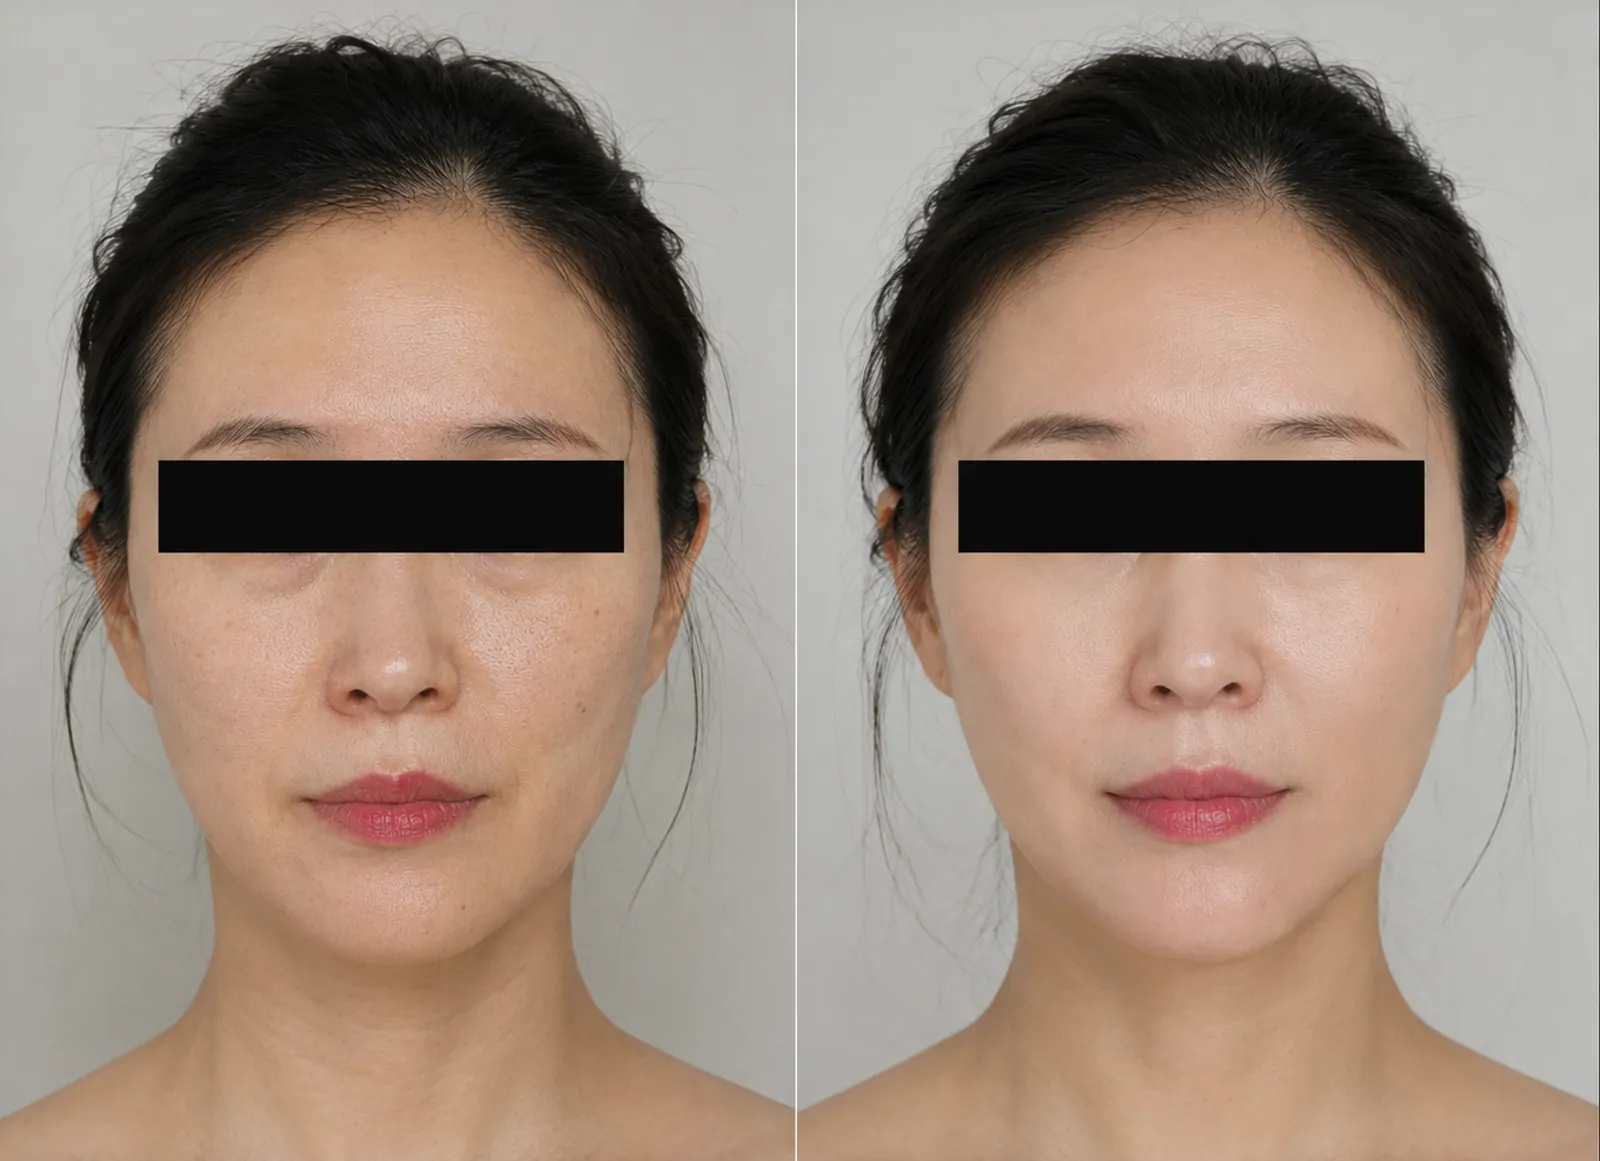
Fewer wrinkles
Having many wrinkles on your face makes you look older. Filling in the furrows of deep wrinkles reduces shadows and makes your appearance much brighter.
How It Works
Design Filler Working Principle
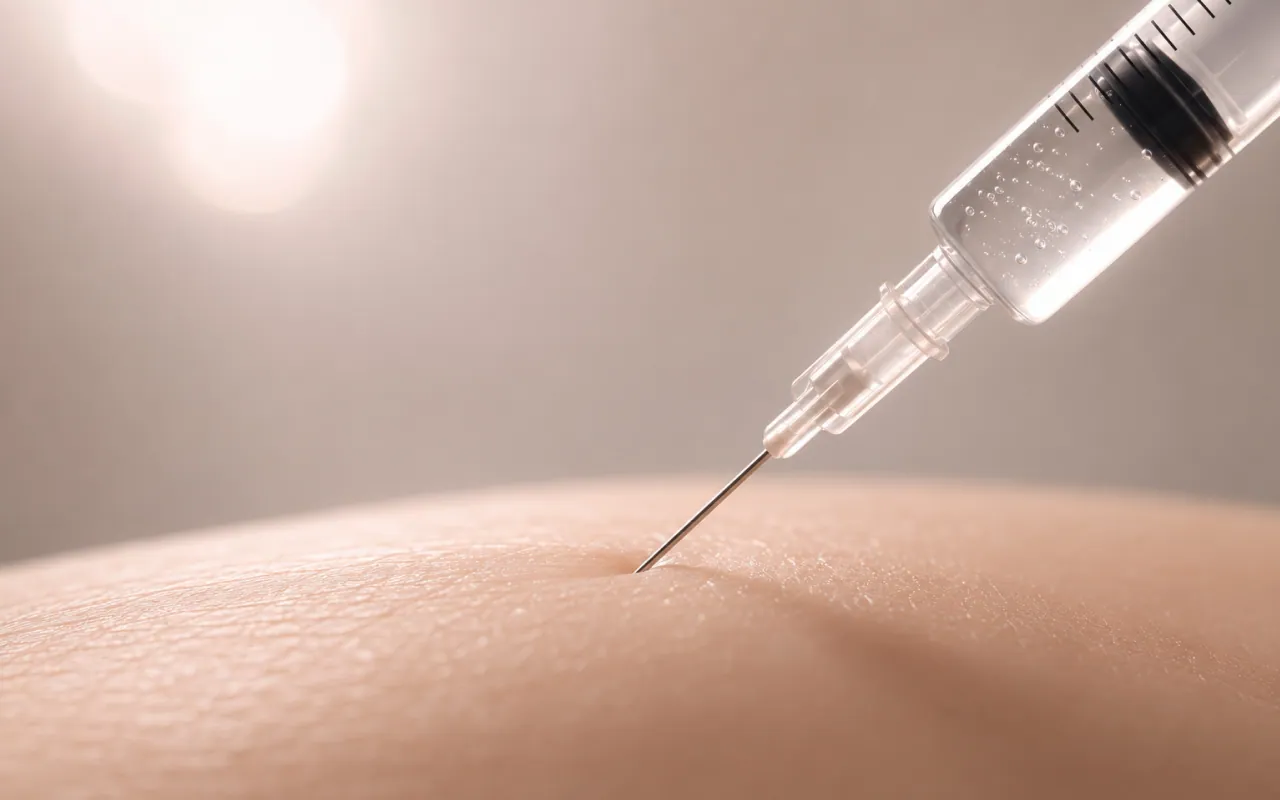
At the required location and depth
Precisely inject hyaluronic acid filler
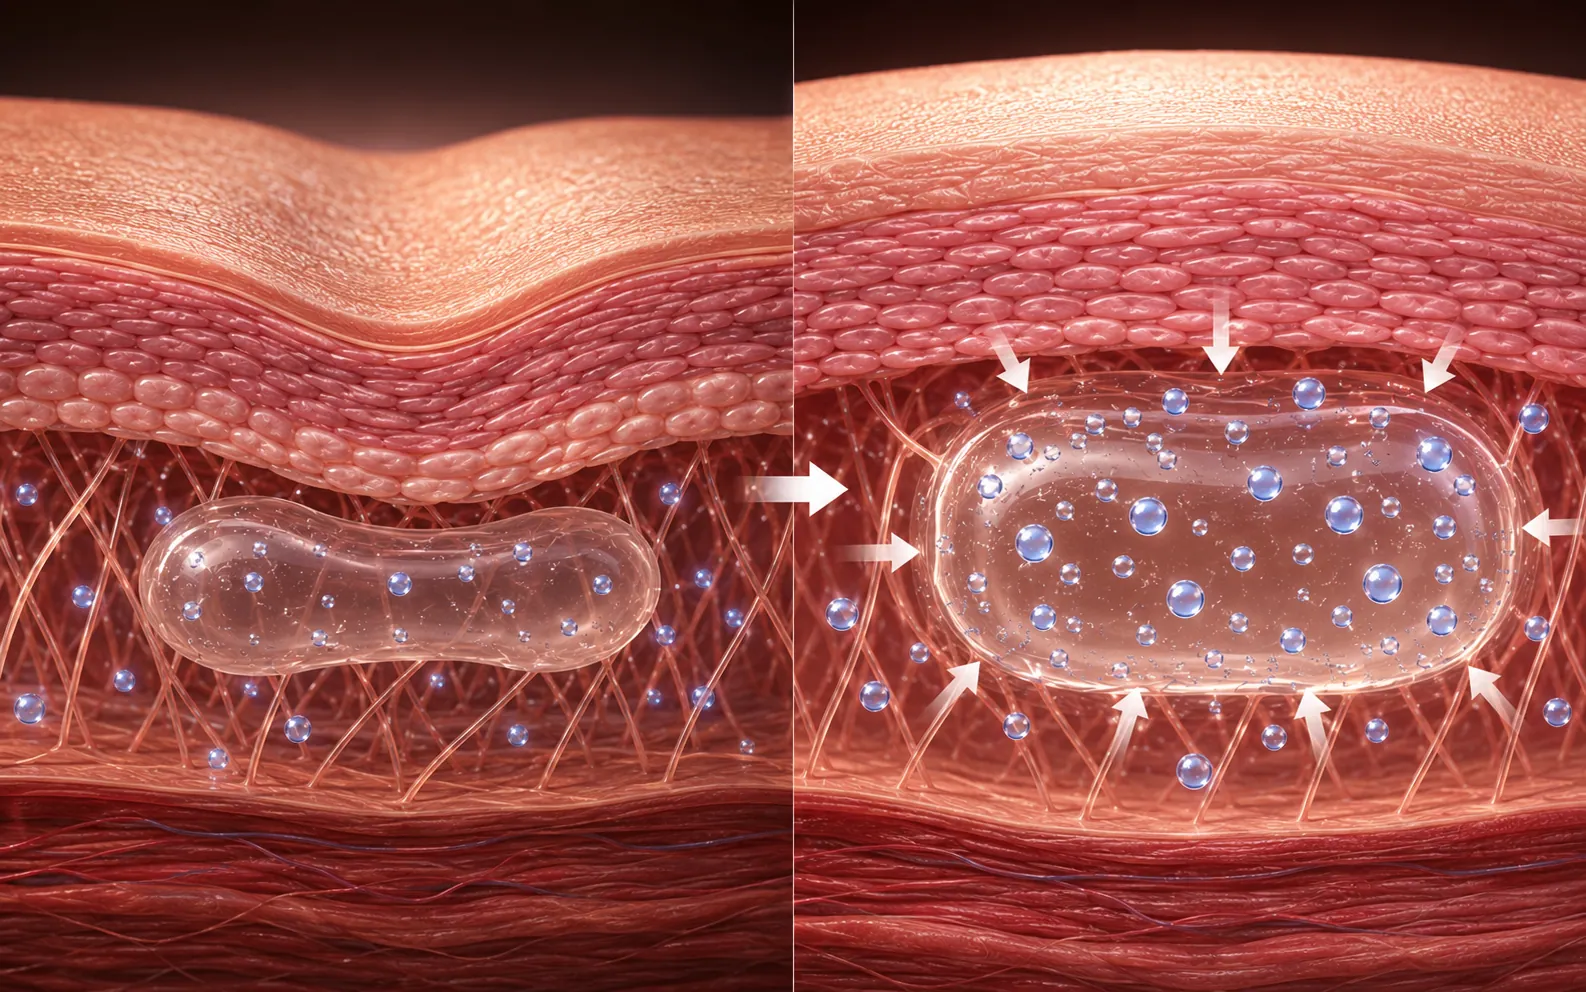
The filler fills the space and retains moisture.
Maintain natural volume
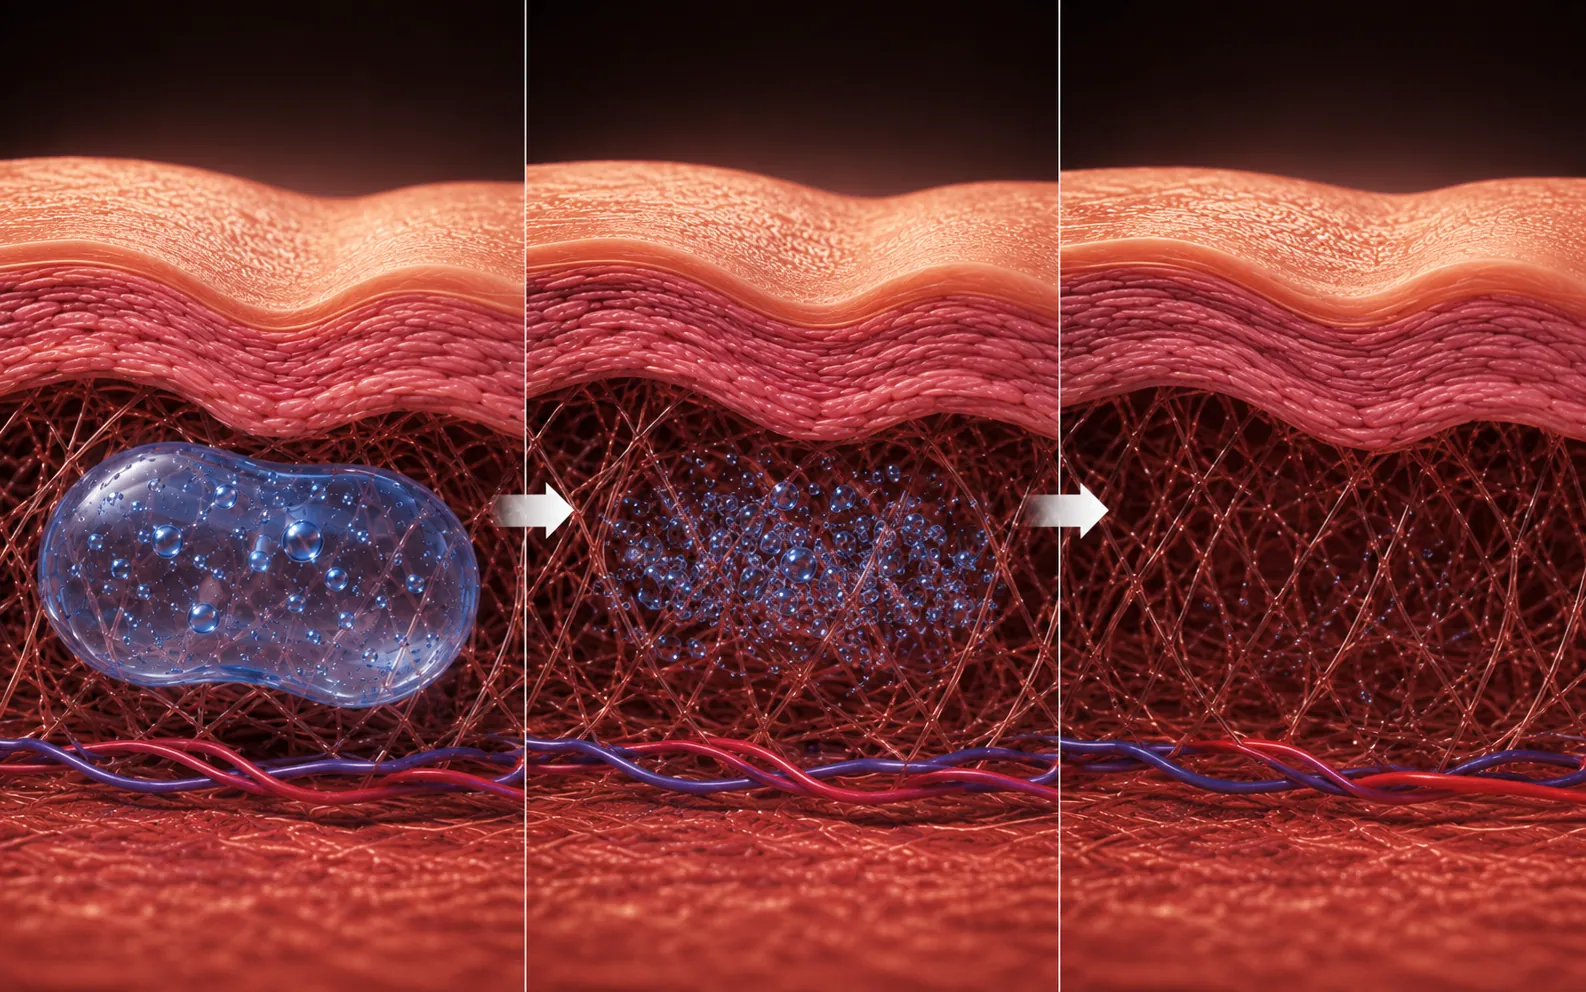
Over time, in the body
It gradually breaks down and is naturally absorbed.
Treatment Areas
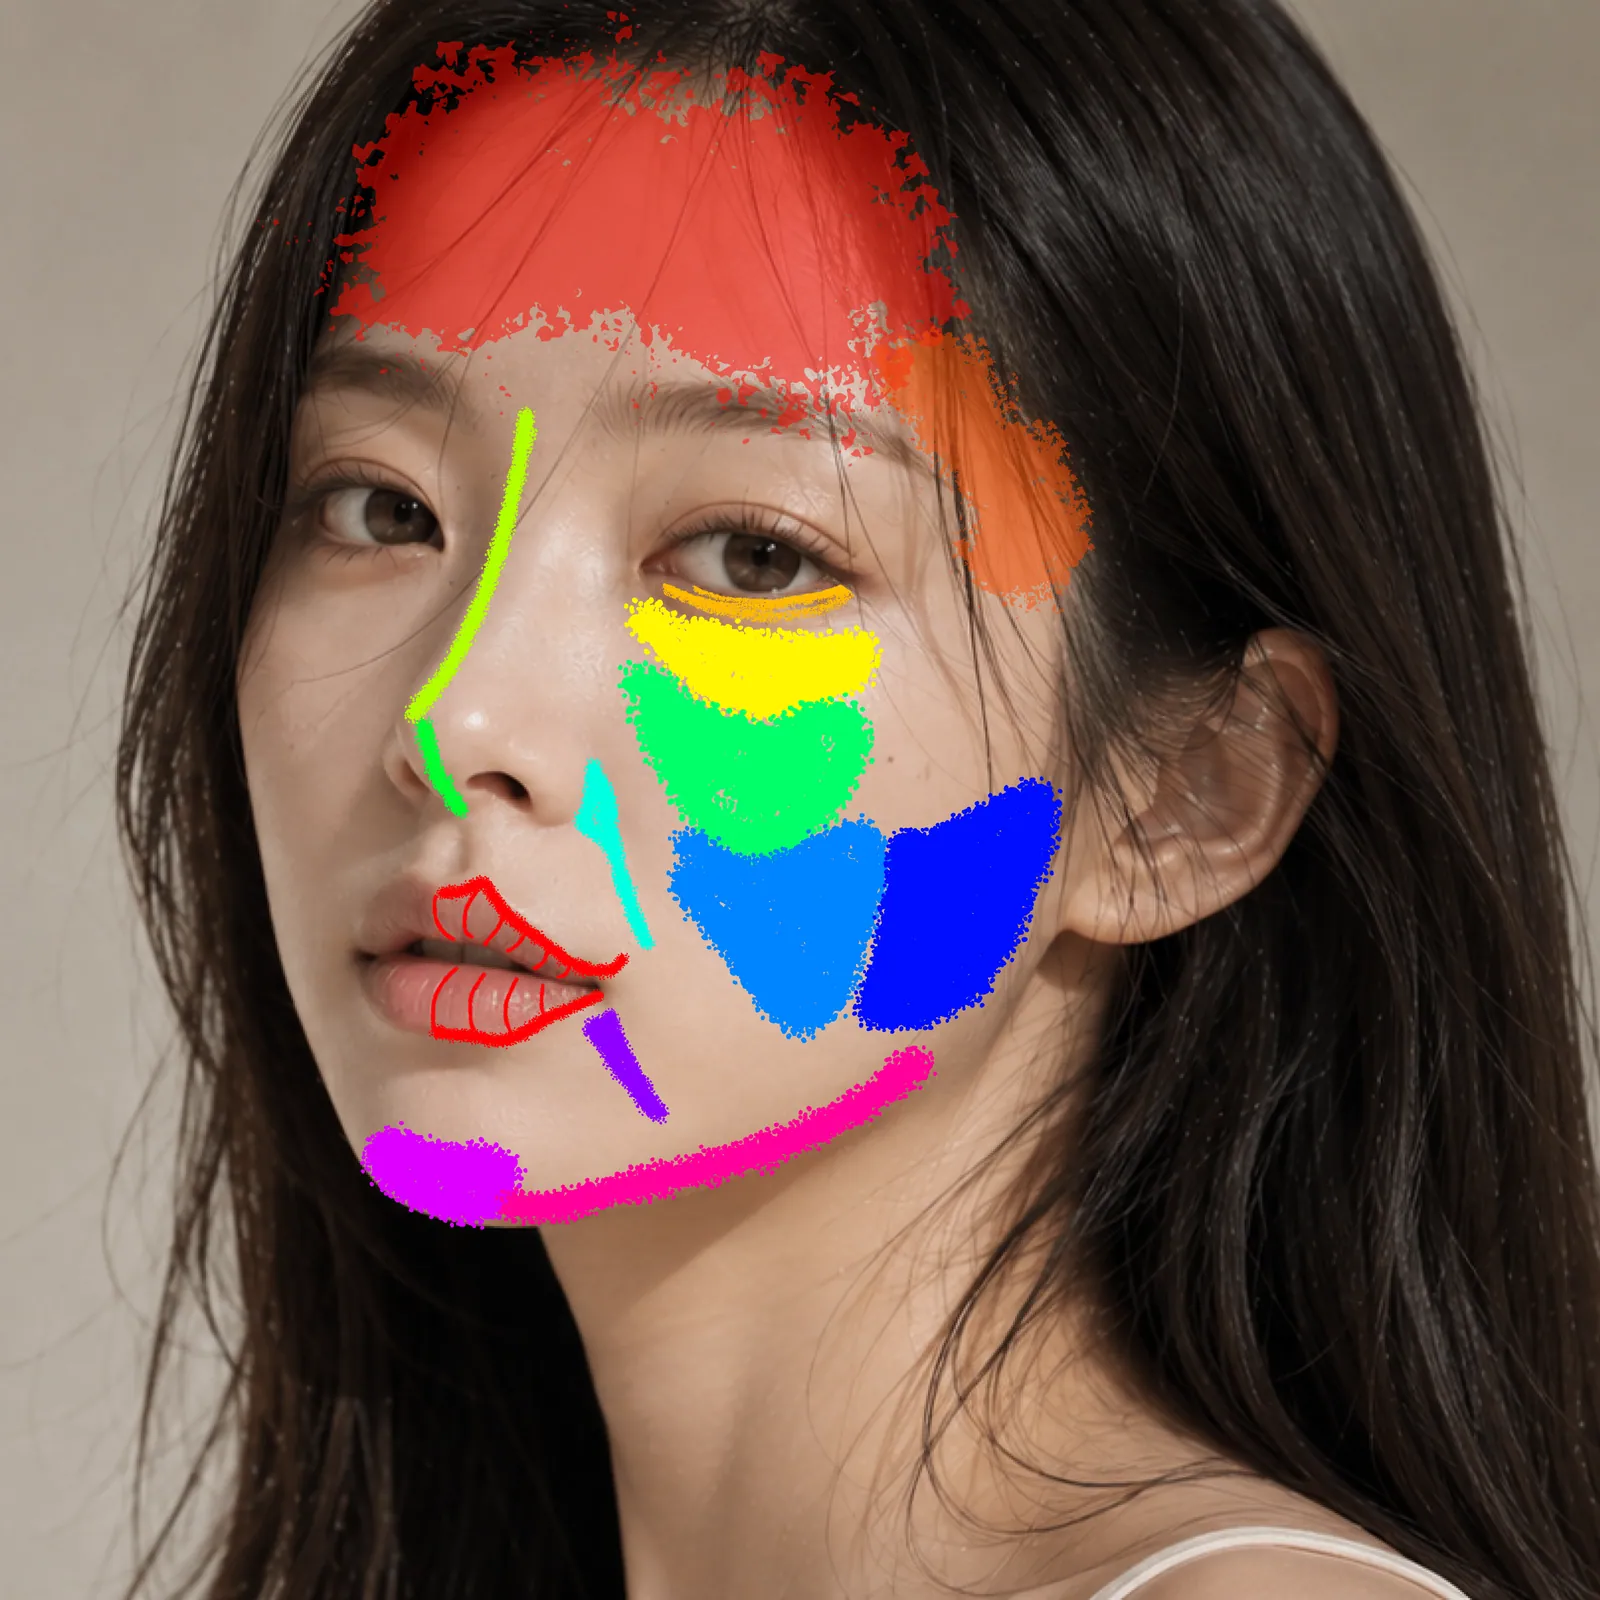
Design filler treatment area
It can be treatment on all areas of the face that require volume.
The layer injected and the type of filler vary depending on the area.
Recommended For
I recommend this to people like this.

Because of the sunken forehead and cheeks
People who look old

The curves of the face line
Uneven person

The bridge of the nose, the chin, the lips, etc.
For those who want to highlight their points

Immediate without surgery
Those who want change
The Episode Difference
Before and After
100% real before and after photos with no retouching
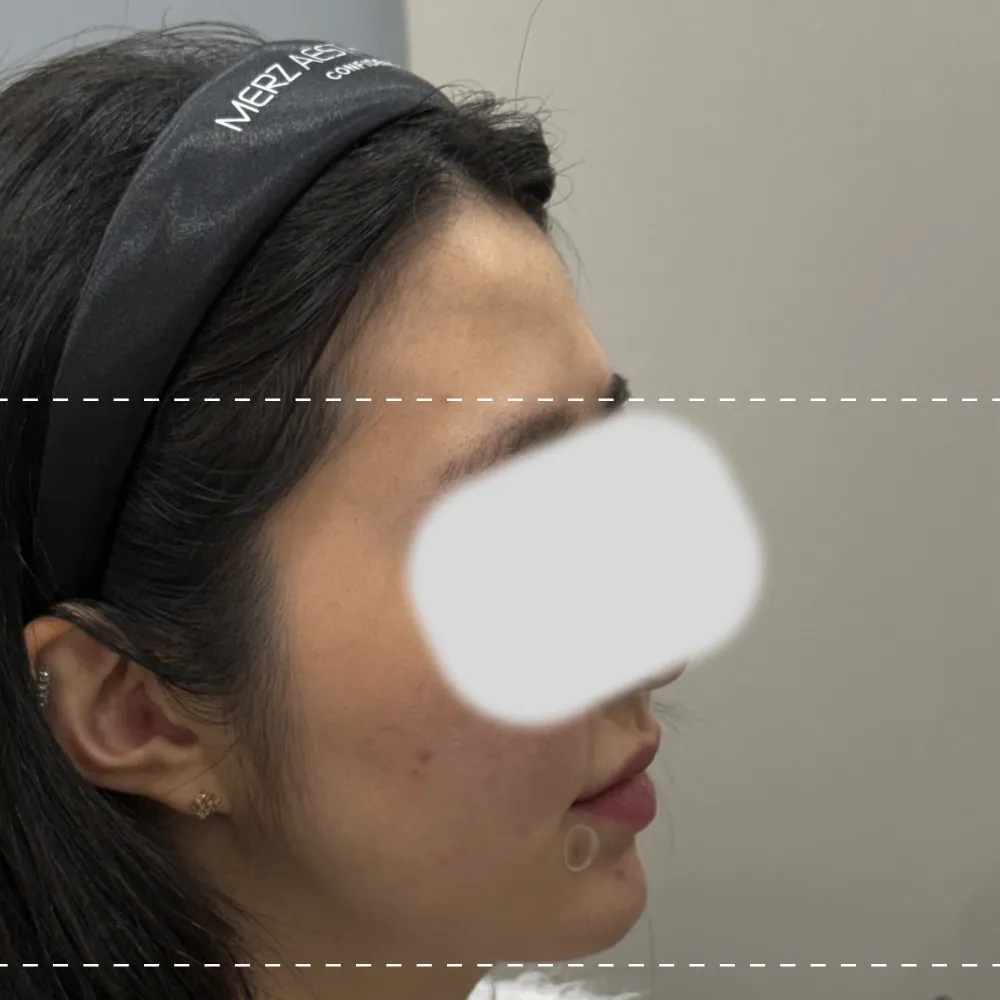
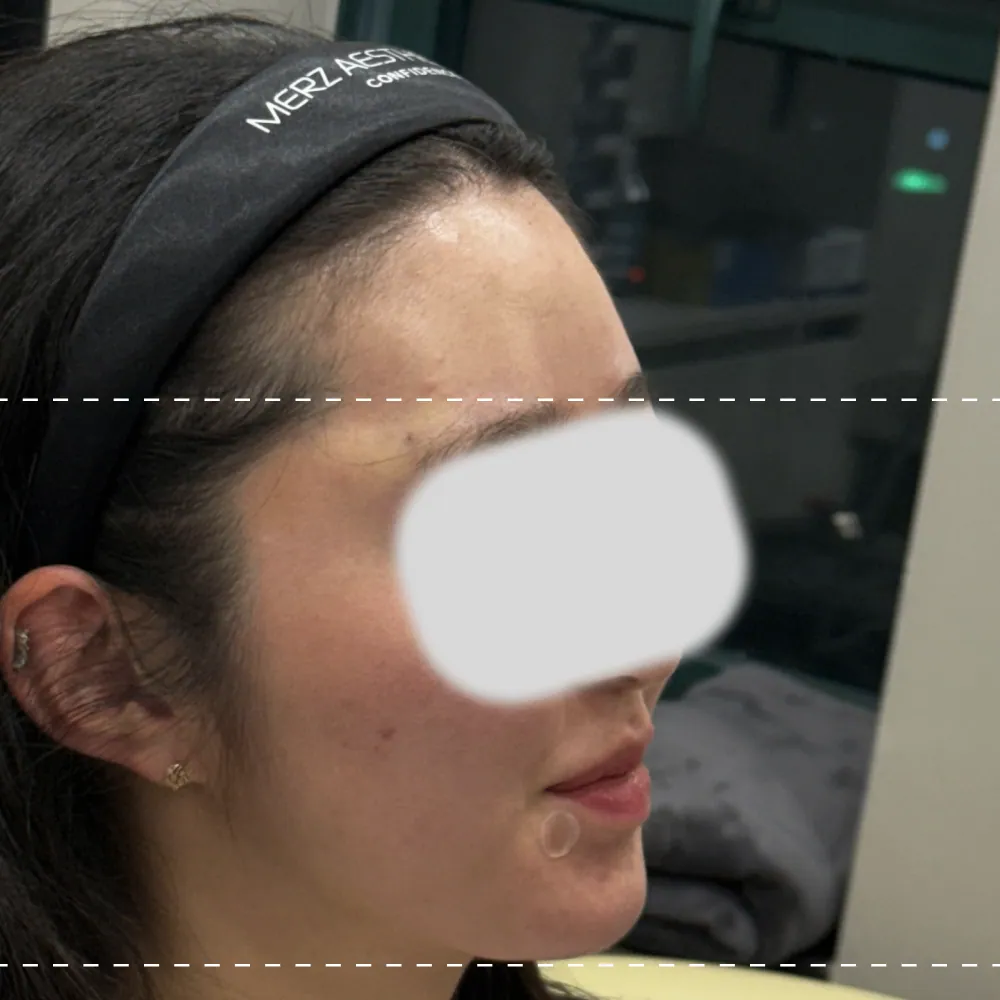
Forehead filler (Restylane) 5cc
frontal
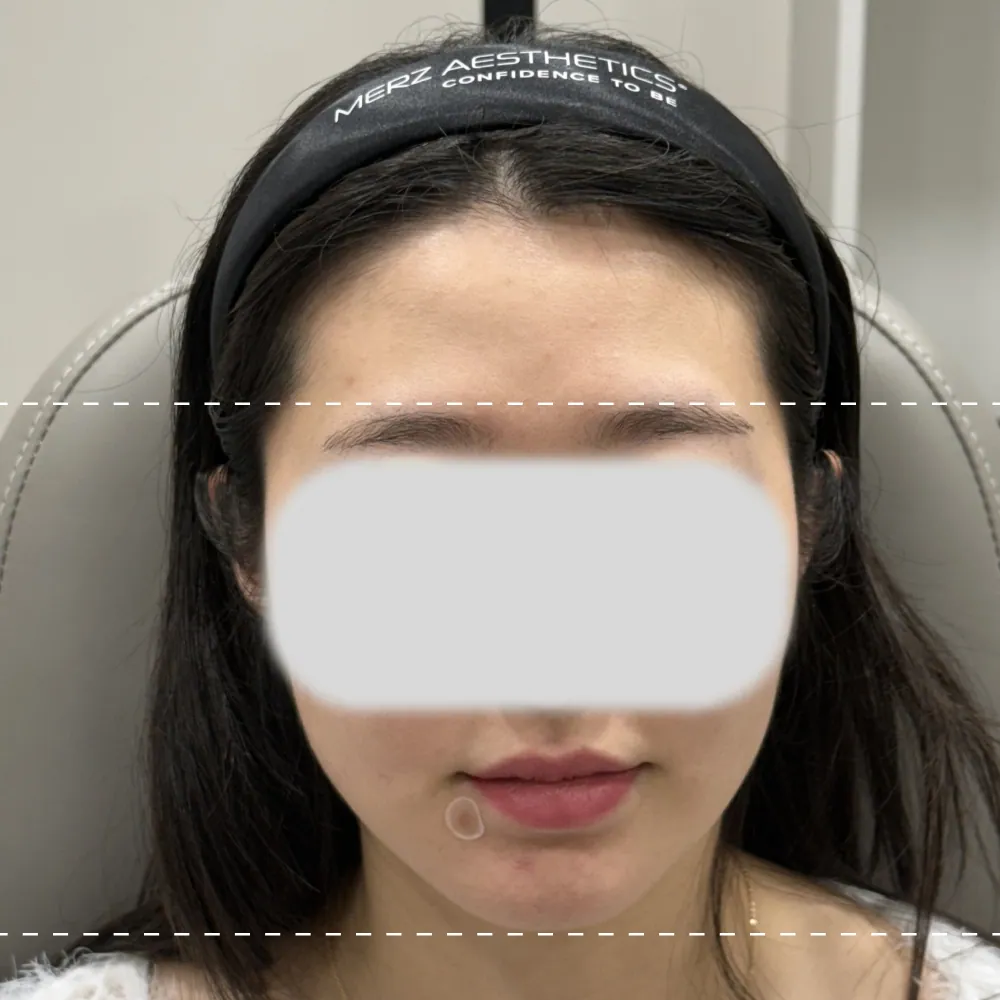
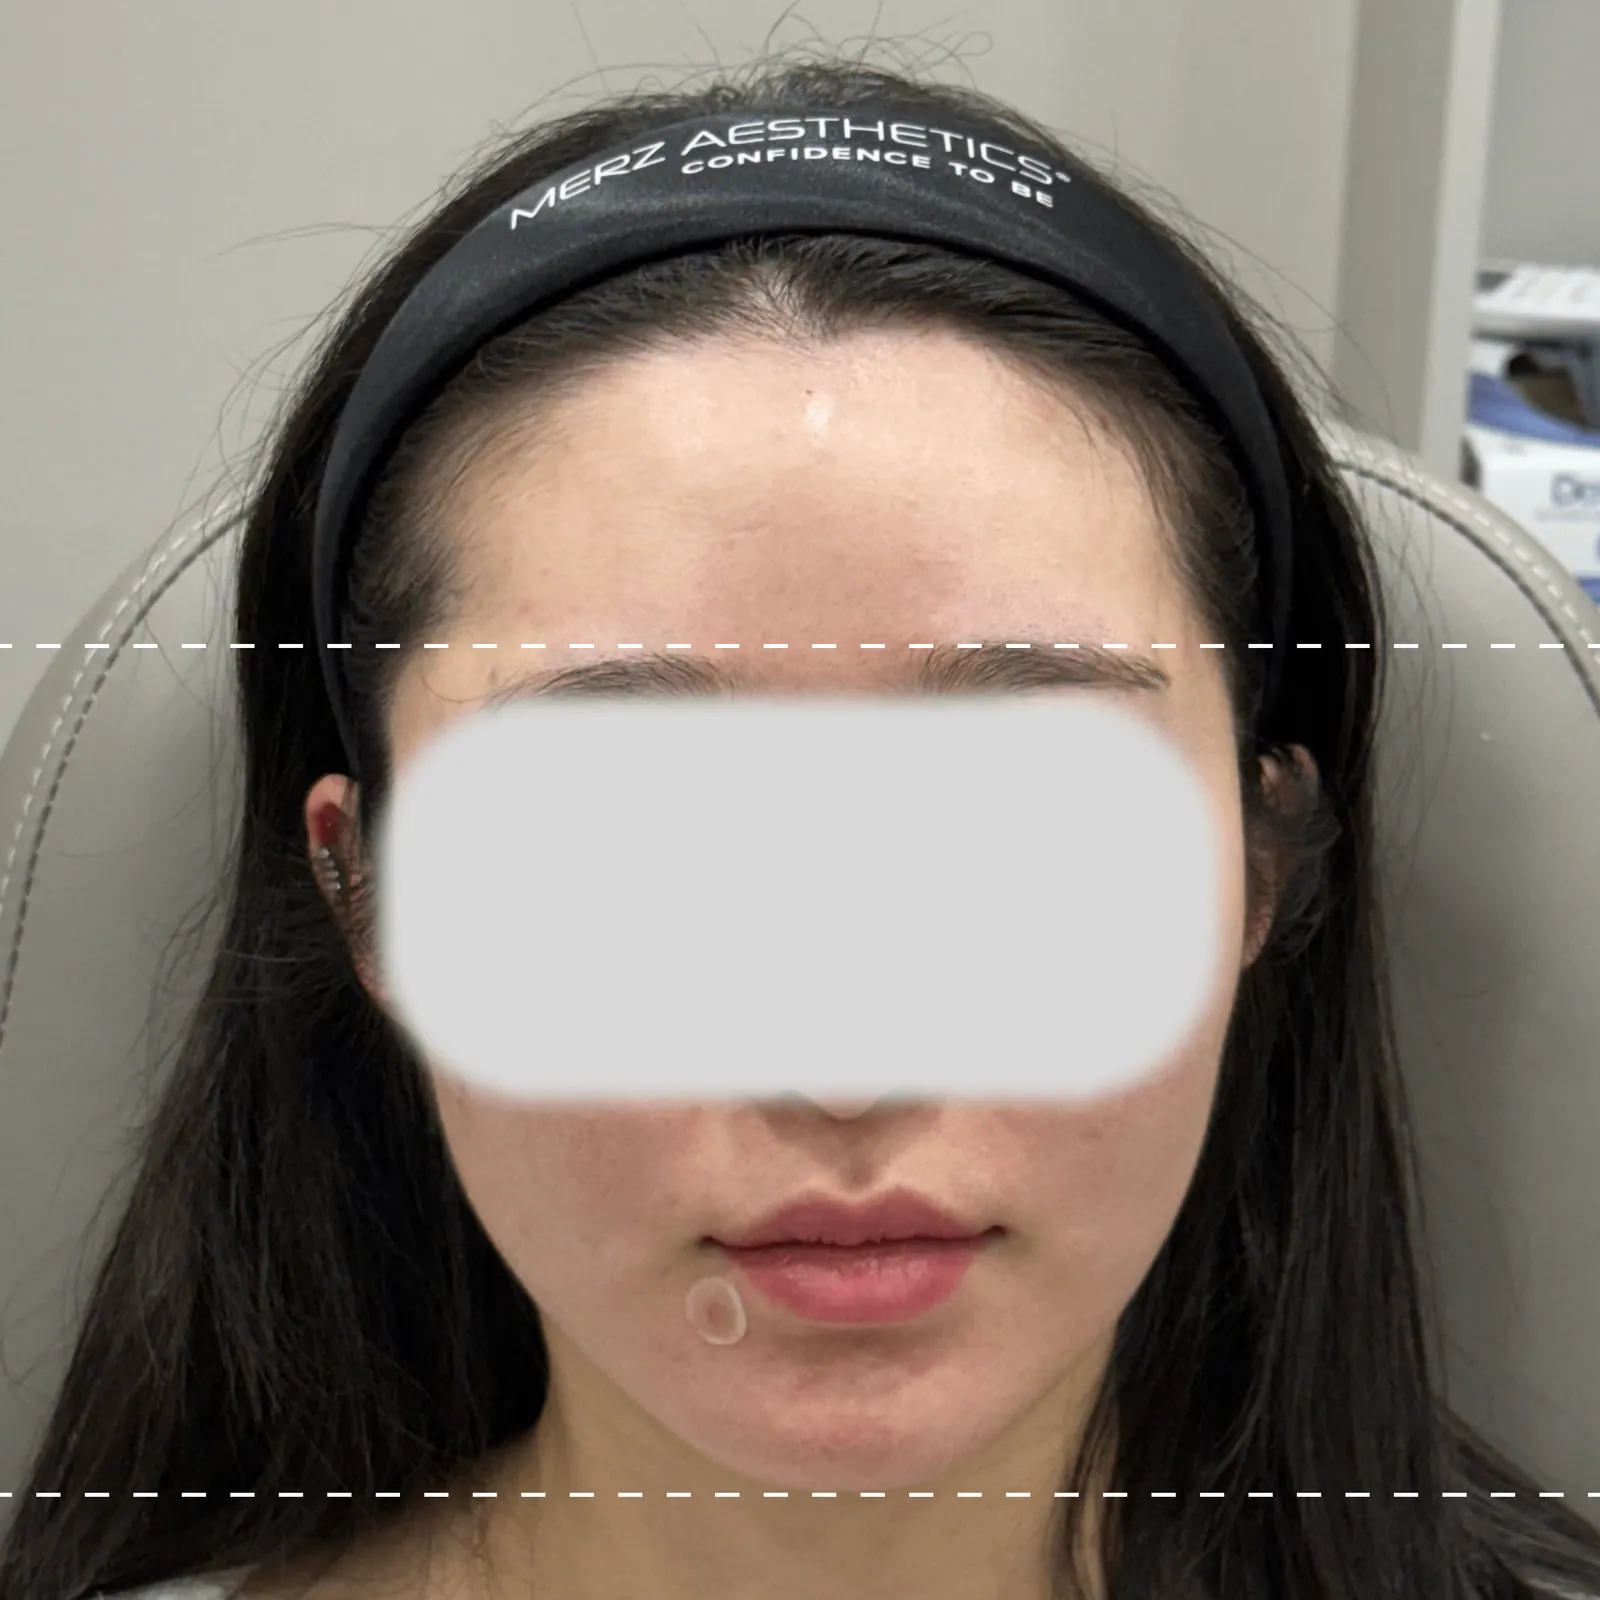
45 degrees to the right
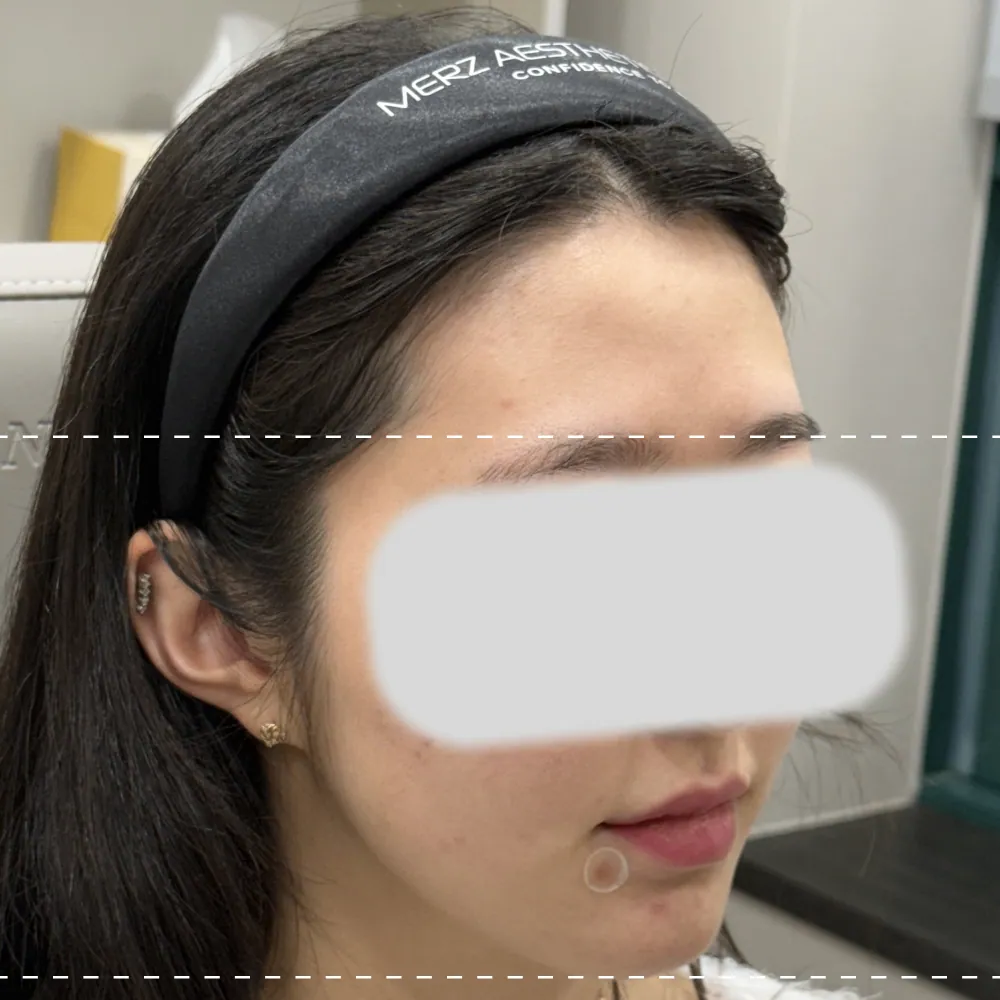
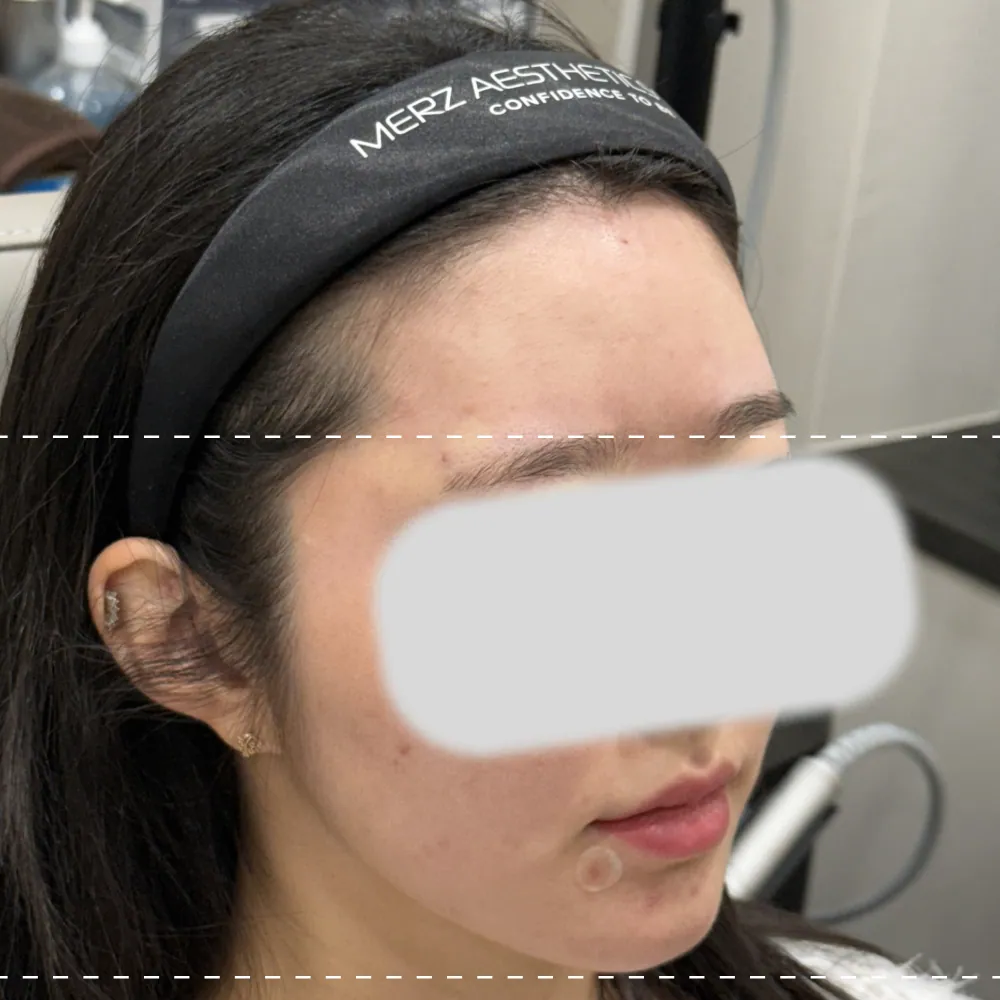
90 degrees to the right
45 degrees to the left
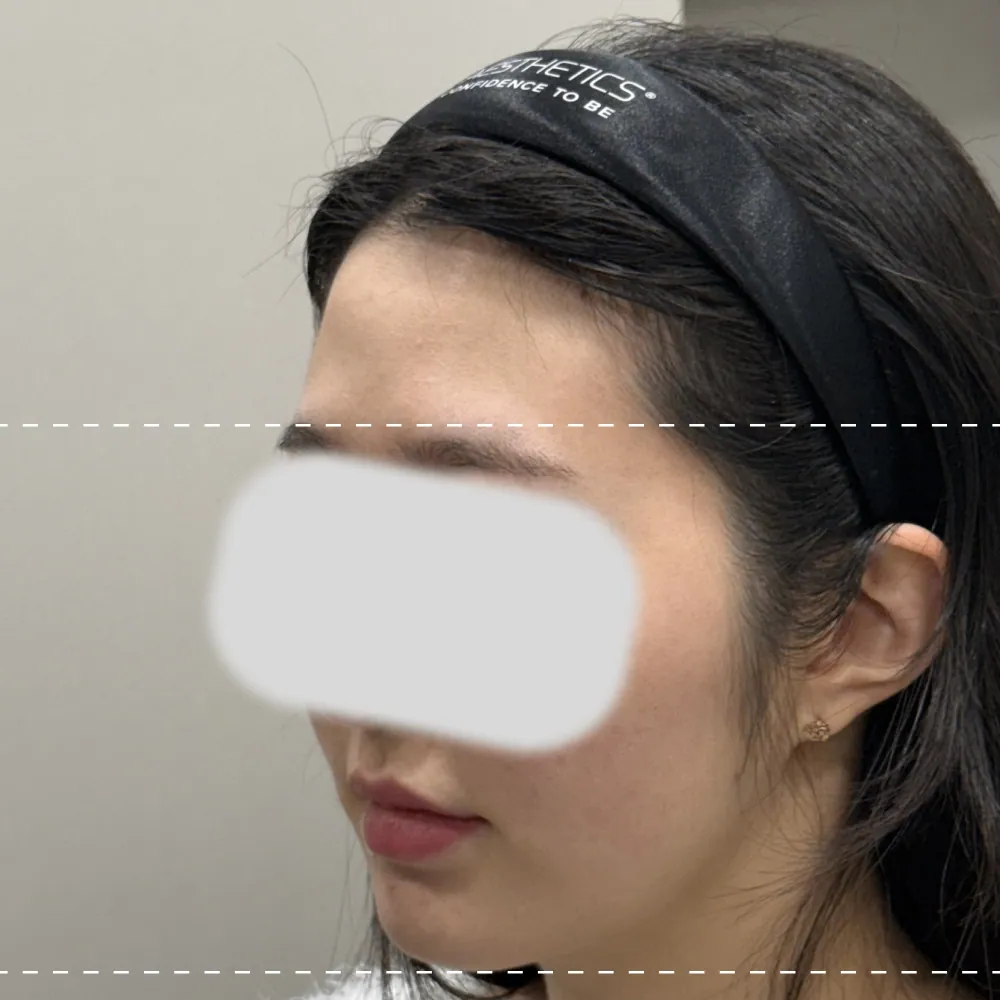
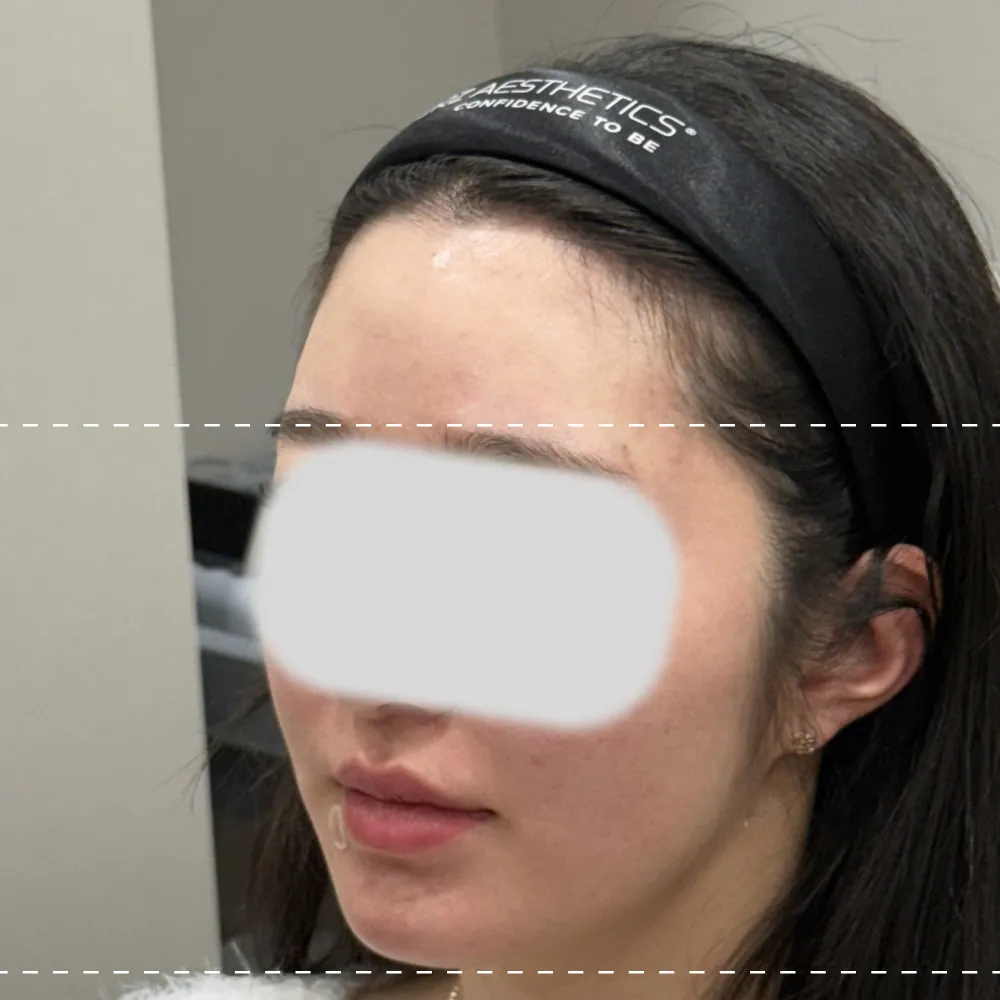
90 degrees to the left
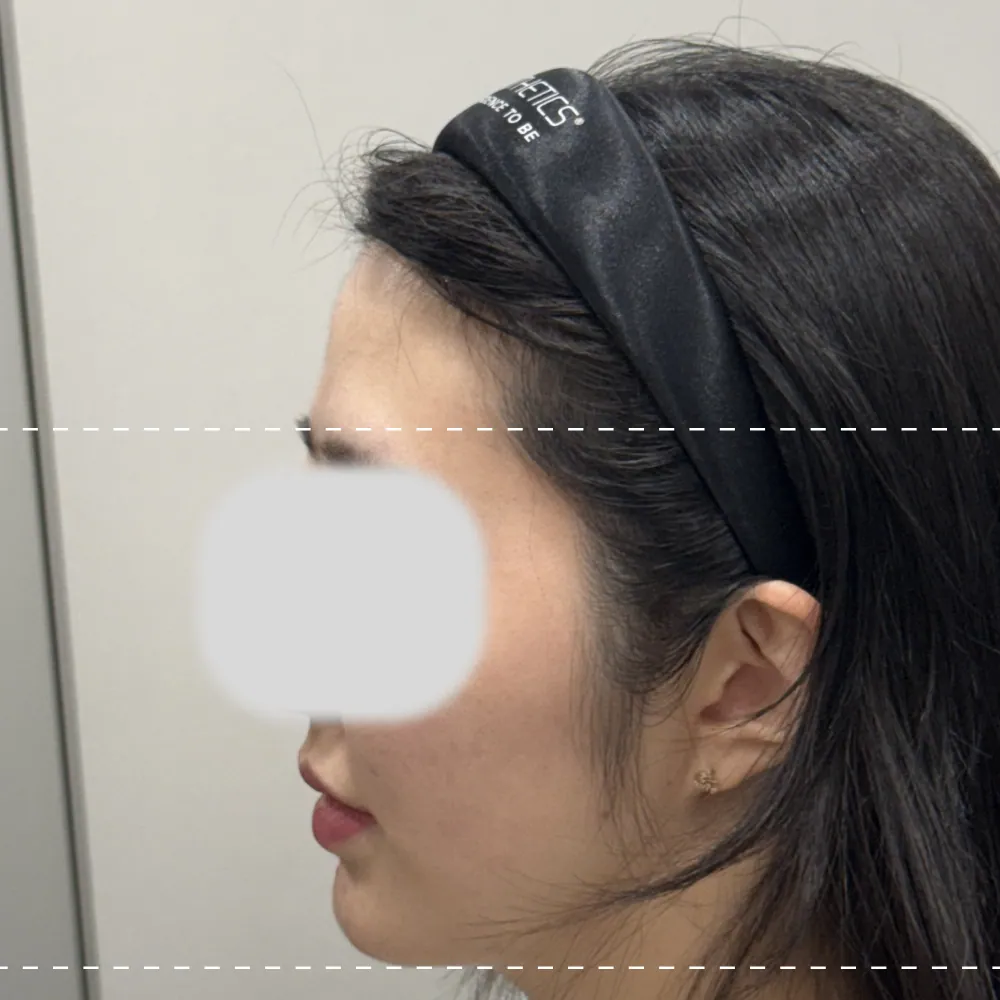
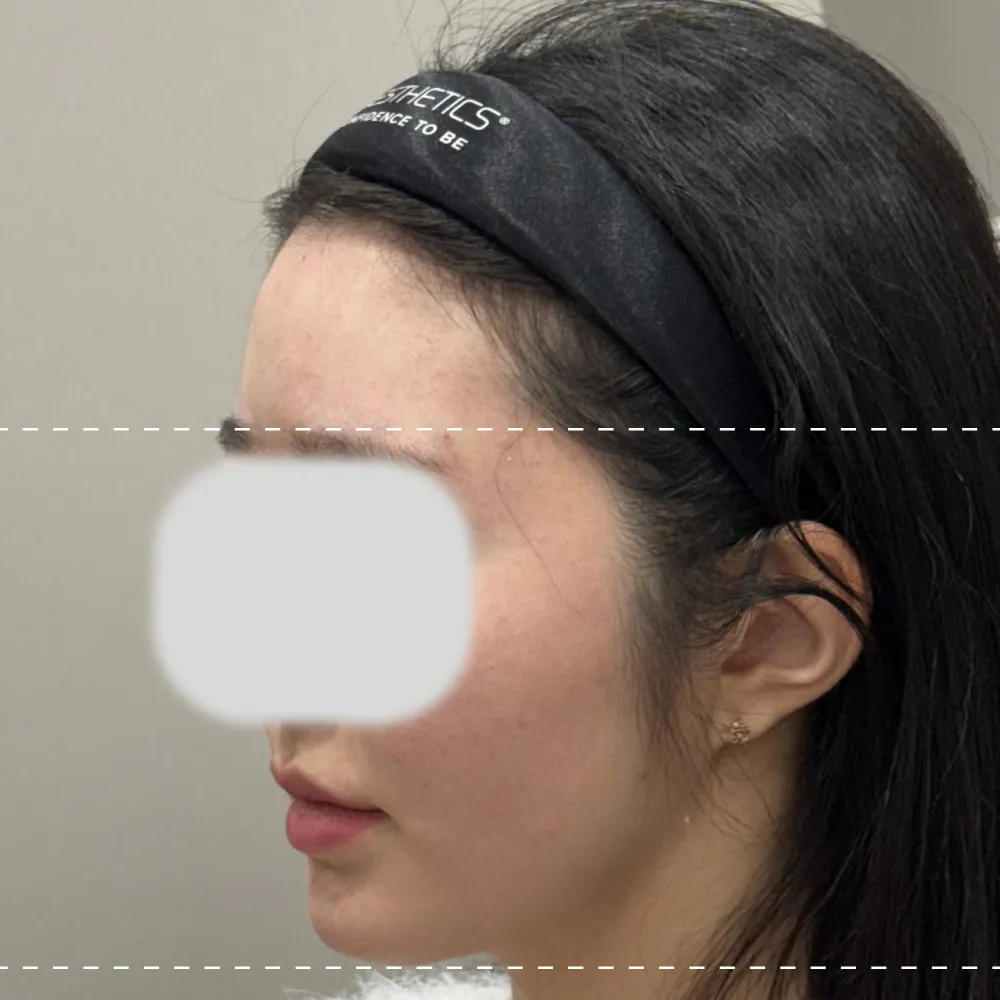
01 As is - Current concerns
The forehead above the eyebrows is flat and sunken.
I'm worried that my forehead looks bumpy.
02 To be - Requirements
I want to create a natural forehead line instead of a forehead that sticks out too much.
I especially wish my S-shaped forehead were smoother, like a C shape.
03 Design - Design Plan
Naturally connect the sunken area from above the eyebrows to the center of the forehead, starting from the most protruding point on the forehead.
Ensures that the gloss is evenly distributed across the entire forehead when light is reflected.
Lip Filler (Restylane Kiss) 1cc
frontal
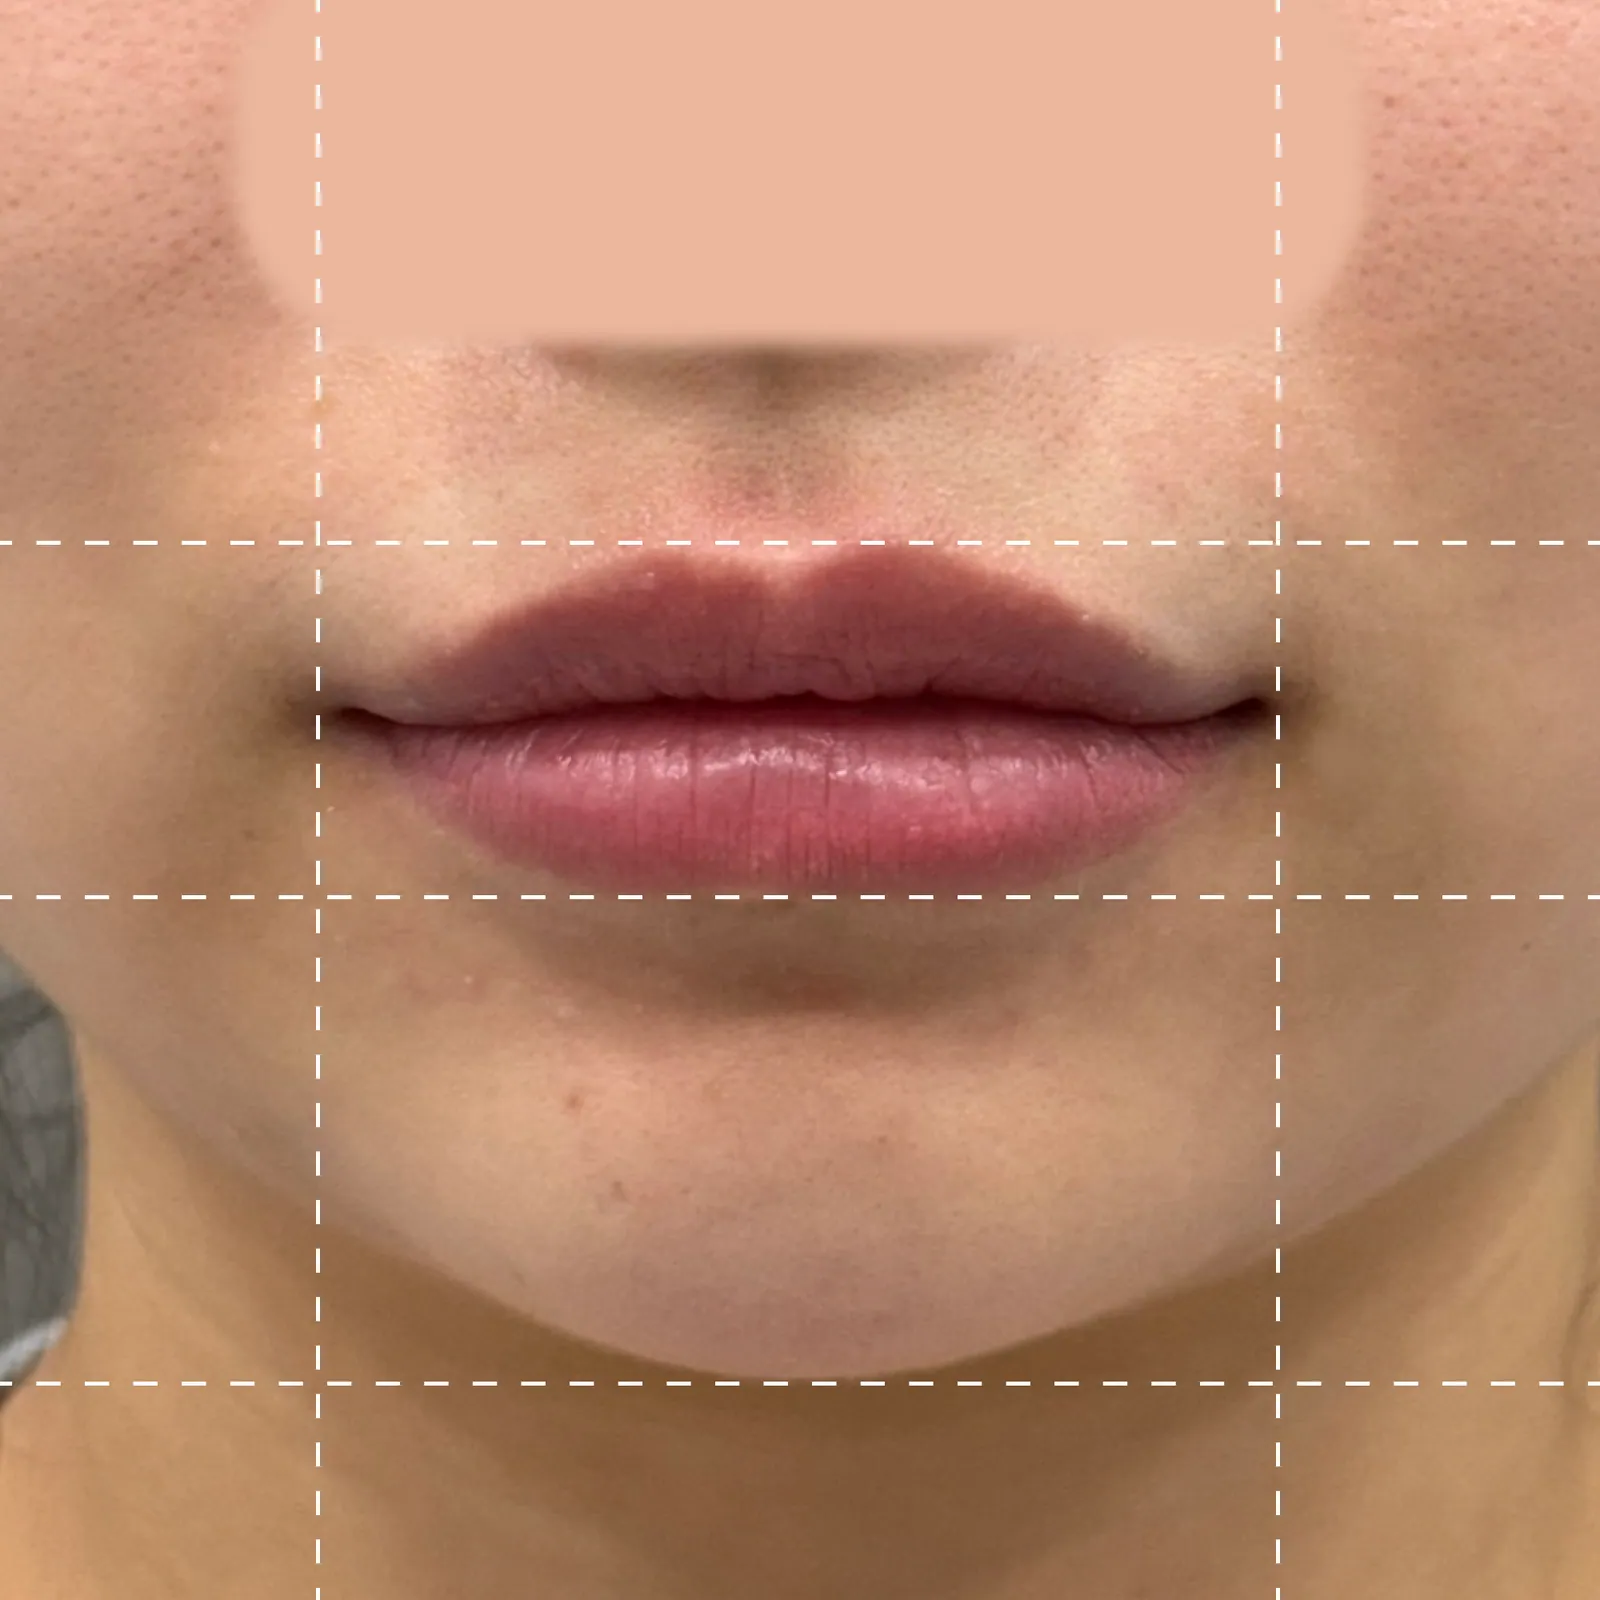
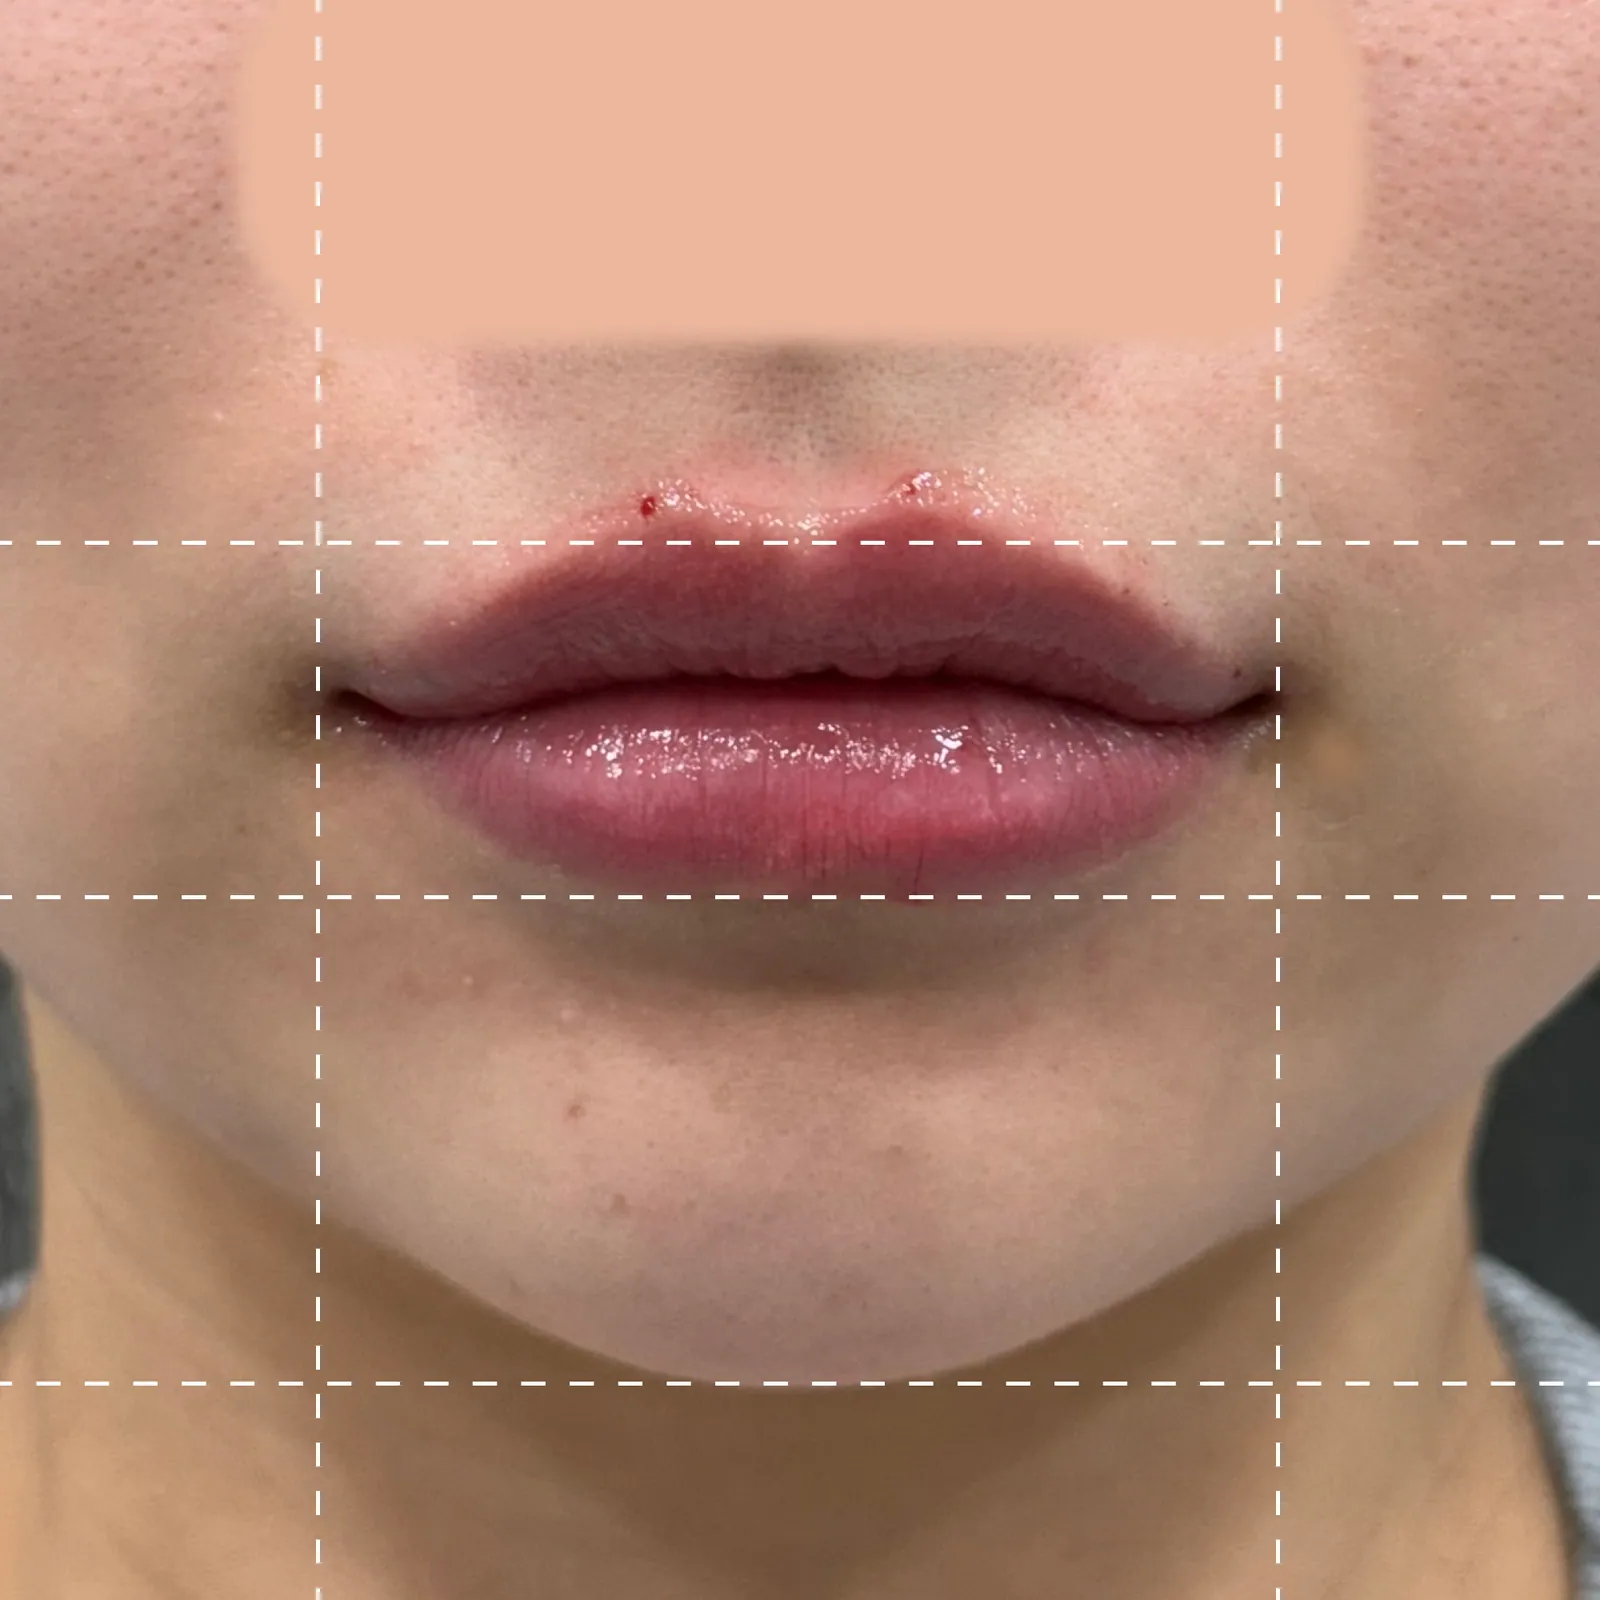
01 As is - Current concerns
I am worried about my indistinct upper lip and my philtrum looking long.
02 To be - Requirements
I want the corners of my mouth to lift a little more and have natural yet attractive lips.
03 Design - Design Plan
Create a distinct lip shape by emphasizing the M-shape in the center of the upper lip.
Increases overall volume while also highlighting the corners of the mouth.
Why It's Different
Every process has its own reason for the EPISODE.
01
As is - To be - Design
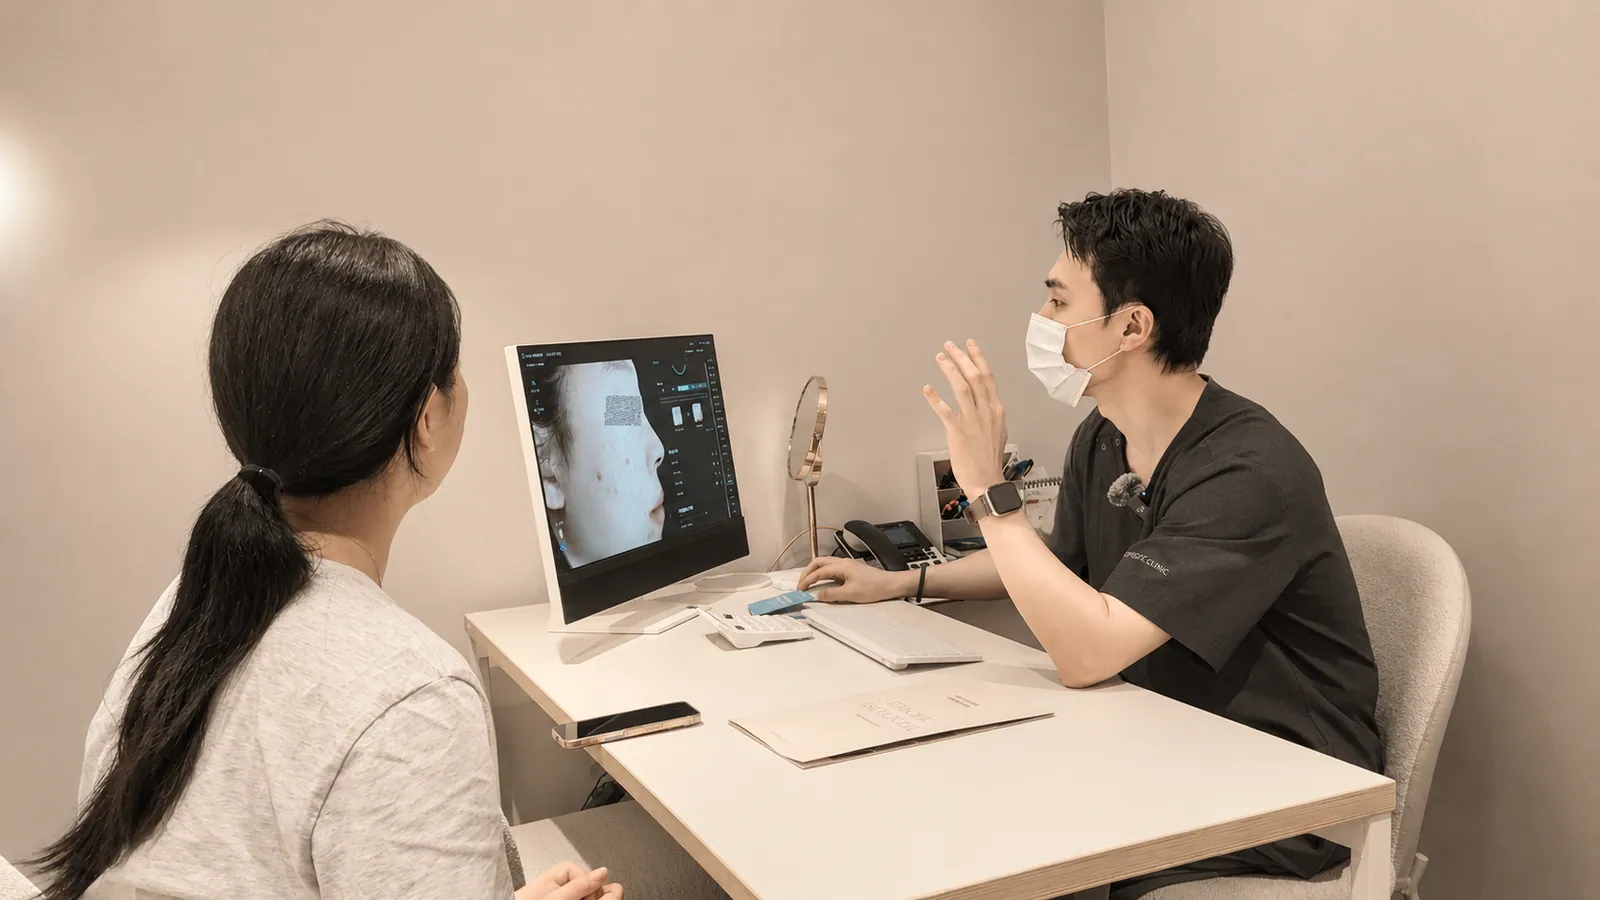
Analyzing the face now,
After hearing the desired shape,
Select the design that fits best.
02
Accurate product and capacity
I confirm it right before my eyes.
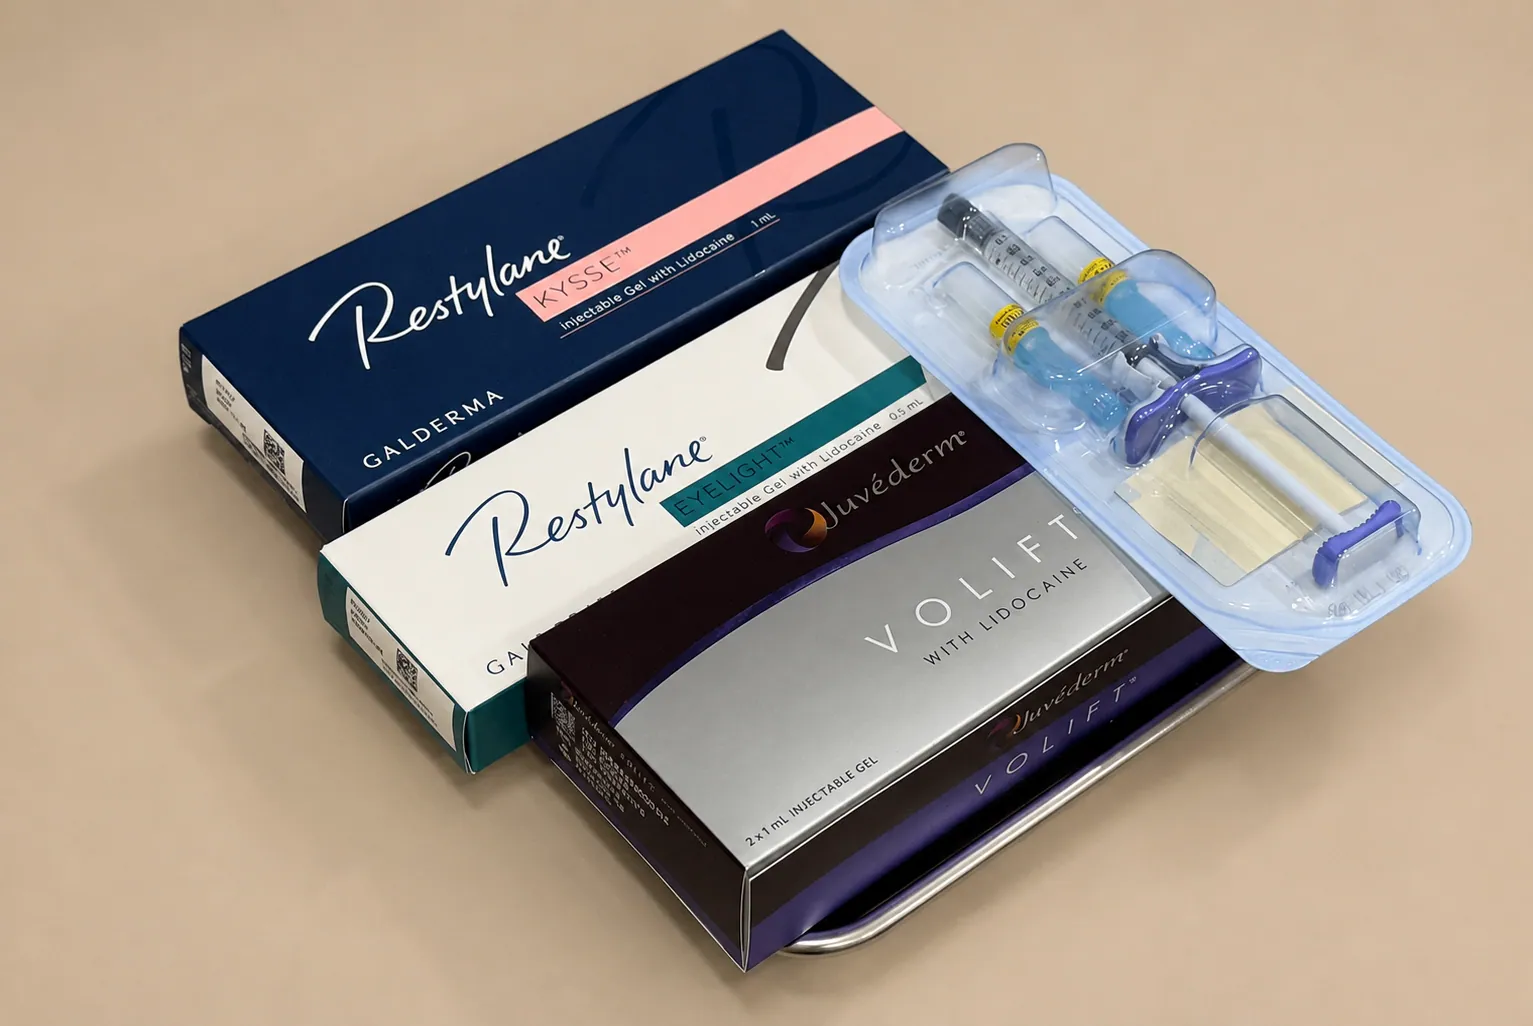
Before the treatment , check together to ensure the filler to be used is genuine, then open it, We also show you the amount to be added (cc) exactly as it is.
RELIABILITY03
If you keep a record
The changes are more visible.

treatment history, remaining treatment , and facial changes in an online report Leave it to see how it changed before and after the treatment You can compare them directly.
RECORDSCare Process
Design Filler proceeds through this process.

01
Anesthesia process

02
design

03
treatment

04
homecoming

05
Provision of treatment report
Some processes will be changed for the promotional treatment.
Notice
Please observe these points after the treatment .
-
1
Please do not touch or rub the injection site vigorously on the day of the treatment . The filler needs time to set.
-
2
Please avoid alcohol, strenuous exercise, and saunas for 24 hours after the treatment . Swelling and bruising may worsen.
-
3
Please avoid strong massage, skin care, and hot compresses on the treatment area for two weeks after the treatment . This may interfere with the filler settling.
-
4
Swelling usually subsides within 2 to 3 days, and bruising within 1 to 2 weeks. As the swelling goes down, the volume and shape naturally settle.
-
5
Initially, the injection site may feel lumpy, but it blends in with the tissue over 2 to 4 weeks and becomes natural.
-
6
If you experience severe pain, paleness, or changes in skin color at the treatment site, please contact the hospital immediately. These are symptoms that require prompt action.